
Figuring out beekeeping equipment is the most intimidating part of getting started in beekeeping. There are a lot of options, designs, and equipment configurations to consider, but it doesn’t have to be that hard.
When we teach beekeeping classes, we do our best to teach students about the most popular equipment and which one might work for them. We also teach that you don’t need everything, but there are few equipment choices that need a little extra forethought.
We focus on the essential pieces needed to take care of bees and answer the most common questions we get about beekeeping supplies. Below we talk through the essentials you will need and provide a few options that will work for you.
Table of Contents
1.What Beekeeping Equipment Do I Need?
- 1.4.1 Round Veil
- 1.4.2 Accordion or Fencing Veil
5. Where Do I Buy Beekeeping Supplies?
- 5.1.1 Langstroth Hives
- 5.1.2 Bottom Boards
- 5.1.3 Hive Covers
- 5.1.1 Top bar Hive "Frames"
- 5.1.2 Top Bar Designs
What Beekeeping Equipment Do I Need?
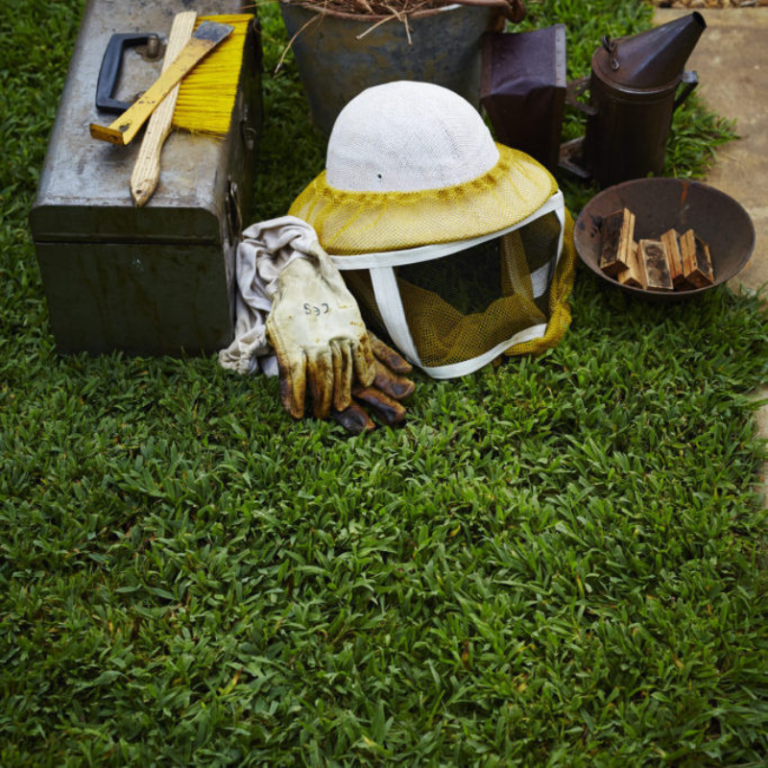
1. Protective Gear – Something to protect you from being stung
2. Hive Tool – Essential for opening hives and checking on progress
3. Smoker – The quintessential beekeeping tool that has been around since the beginning
4. Feeding Supplies – Something that makes it easy to give bees sugar syrup
5. Beehive– The actual equipment that the bees live in
This list of 5 things covers nearly everything a beekeeper needs to maintain a beehive. There are some other things a beekeeper may need later like a honey extractor or a swarm trap, but those generally aren’t needs, especially during your first year.
What Beekeeping Equipment Do I Need?

1. Protective Gear – Something to protect you from being stung
2. Hive Tool – Essential for opening hives and checking on progress
3. Smoker – The quintessential beekeeping tool that has been around since the beginning
4. Feeding Supplies – Something that makes it easy to give bees sugar syrup
5. Beehive– The actual equipment that the bees live in
This list of 5 things covers nearly everything a beekeeper needs to maintain a beehive. There are some other things a beekeeper may need later like a honey extractor or a swarm trap, but those generally aren’t needs, especially during your first year.
Protective Gear
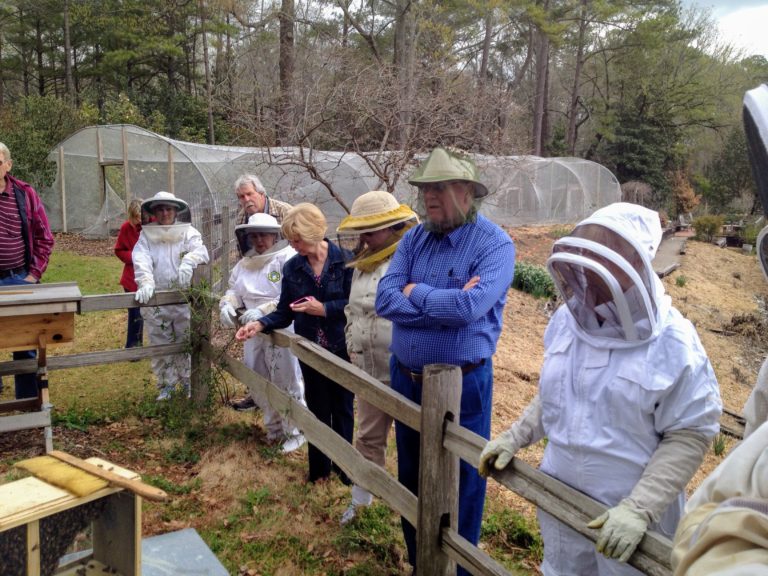
Don’t skimp on this one, trust us. You want to feel confident that you are as protected as you reasonably can be while working with your bees. If you have ever spent any time on Youtube looking at beekeepers, you’ll see beekeepers taking care of bees without protective gear. It’s a risky business, but the risk will reduce as you learn what will set off bee’s defensive behavior.
The attitudes of colonies can change from one to another, even when they are side by side. So it’s wise to have good protective gear you know how to use and that is in good condition
Protective Gear

Don’t skimp on this one, trust us. You want to feel confident that you are as protected as you reasonably can be while working with your bees. If you have ever spent any time on Youtube looking at beekeepers, you’ll see beekeepers taking care of bees without protective gear. It’s a risky business, but the risk will reduce as you learn what will set off bee’s defensive behavior.
The attitudes of colonies can change from one to another, even when they are side by side. So it’s wise to have good protective gear you know how to use and that is in good condition
Beekeeping Gloves
Beekeeping Gloves
The two most popular types of leather for beekeeping gloves are goatskin and cow skin. Both work well and the differences are subtle between the two. Goatskin is a little thinner and provides better dexterity, which is a big plus when working with bee frames. Cowskin gloves are thicker and provide slightly more protection from stings, but you give up some ability to grab frames with your fingers easily.
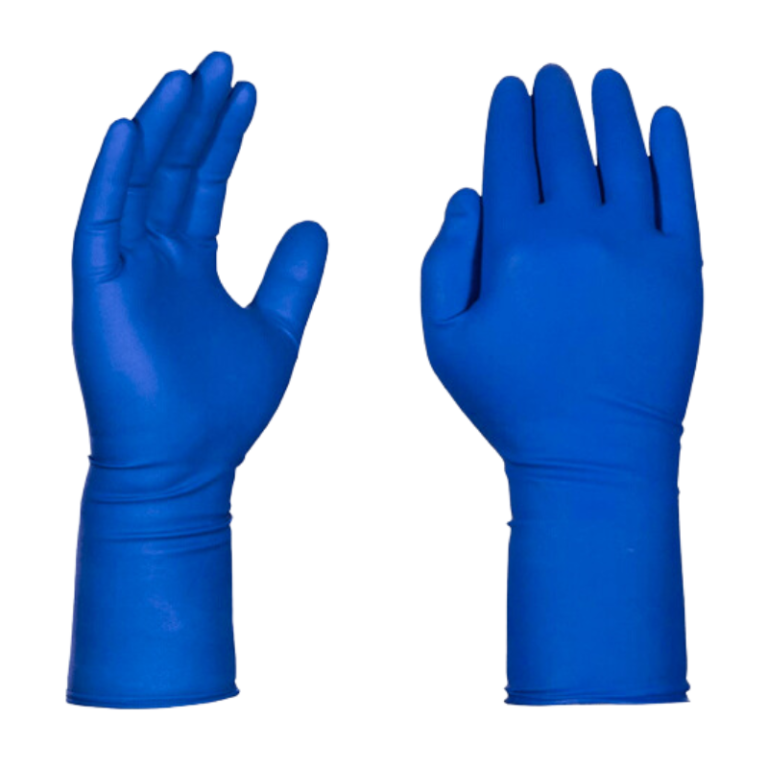
Some beekeepers even opt to use latex gloves when taking care of their bees. This is a good option for some as it gives beekeepers a significant amount of dexterity and good protection from stings. These are also great for using when working with sugar syrup or medications for your bees. Get the ones with the long cuff like these; they help protect your wrist better. Don’t get the black gloves, they will attract bees when they have had enough of you.
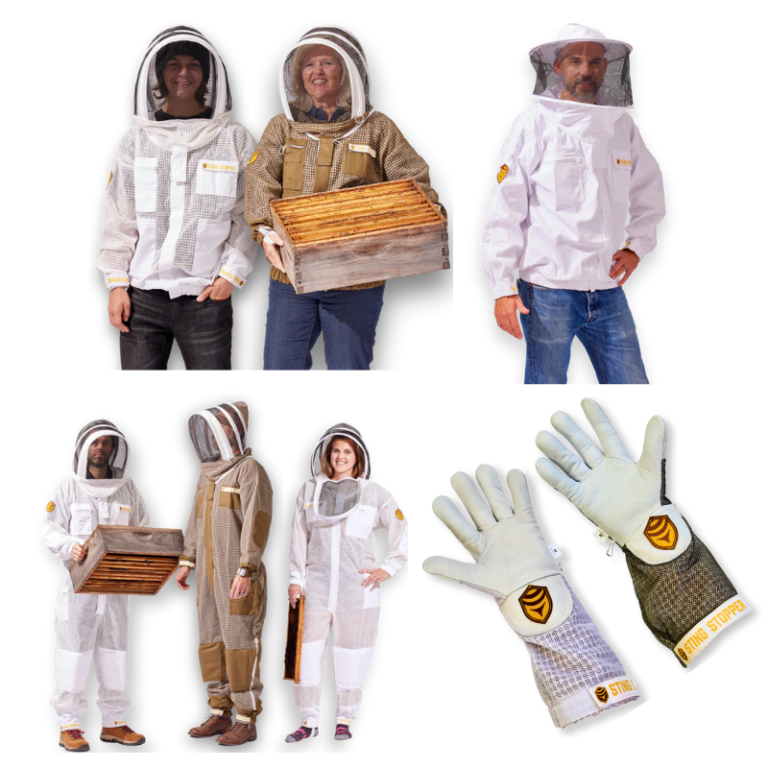
Beekeeping gloves are different from gardening gloves or work gloves because their sleeve typically goes up to the elbow or beyond. The sleeve of the glove overlaps with the sleeve of the jacket or suit, so bees are not able to crawl between the two.
They are also typically a white or light color that prevents bees from going directly to it when they want to sting. Dark colors are generally the first place bees go when looking for something to sting.
Beekeeping Glove Materials
Beekeeping Glove Materials

Beekeeping Jackets
Beekeeping Jackets
While you may think of beekeepers as covered head to toe in a white bee suit, in reality, most are using jackets instead of the suit. The beekeeping jacket offers enough protection from stings while still being easy to put on and take off. Believe it or not, honey bees are actually very passive and are not always wanting to sting their keepers.
There are many styles of jackets you can buy, but it boils down to two types. These are the basic styles available, and aside from the style, they will vary widely in quality and features. It’s tough to tell from an image if the material is of good quality, especially for beginners. Speaking from experience, this is an example of one that is not a good quality material or design. One of the signs of a cheap jacket is the quality of the veil. The screen on the veil should be a semi-flexible metal mesh instead of a net-like screen.
Thick cotton jacket with removable veil
SINGLE-LAYER COTTON JACKET: You can get the full cotton jacket with the basic, single-layer cotton with a tight weave. This type of material gets fairly hot, and in our opinion is best for a backup jacket or something for guests to wear when visiting your hives. The material on these jackets isn’t like a cotton towel or denim but are more like a long-sleeve button-down. The quality of them can vary greatly from supplier to supplier, but most of the good ones have a little heft to them.
It seems to us that the lower quality jackets are always the single-layer cotton jackets. We find the material is rather a thin cotton, and the overall design or fit of the jacket is not ideal. Some tips are to look at how the veil attaches and the quality of the zippers. Quality zippers, thick fabric, and a removable veil are good features to look for.
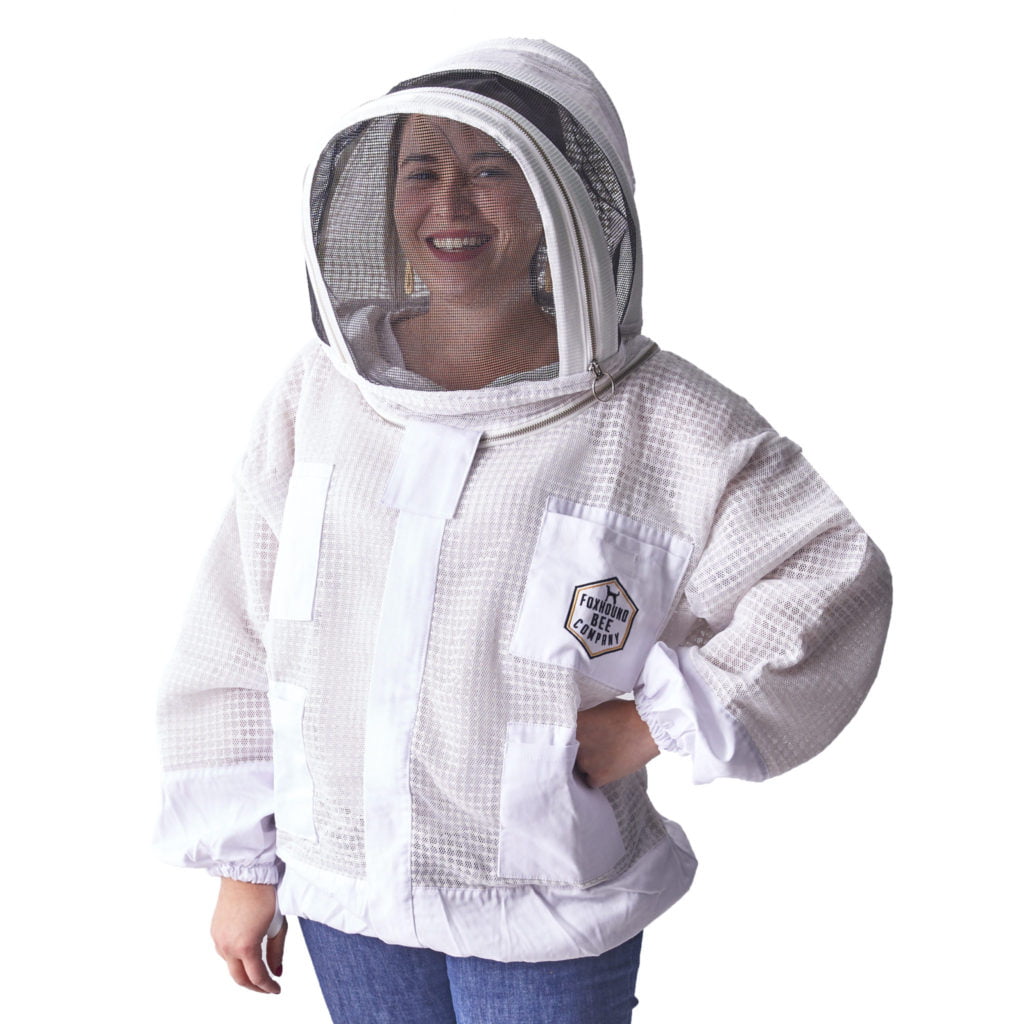
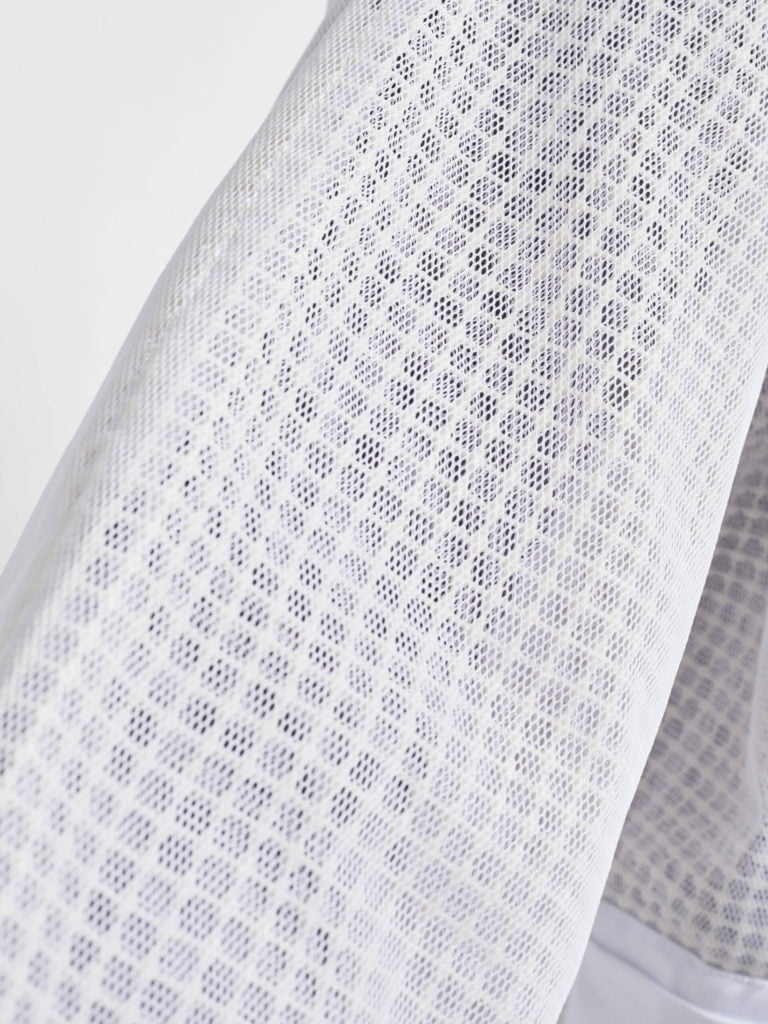
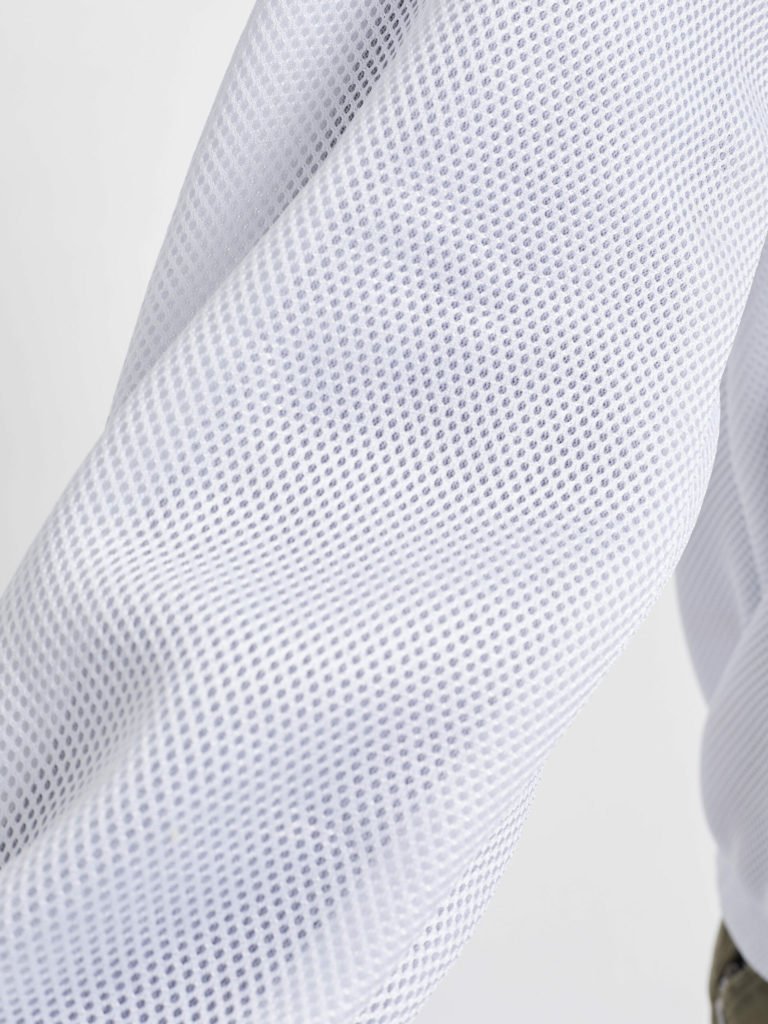
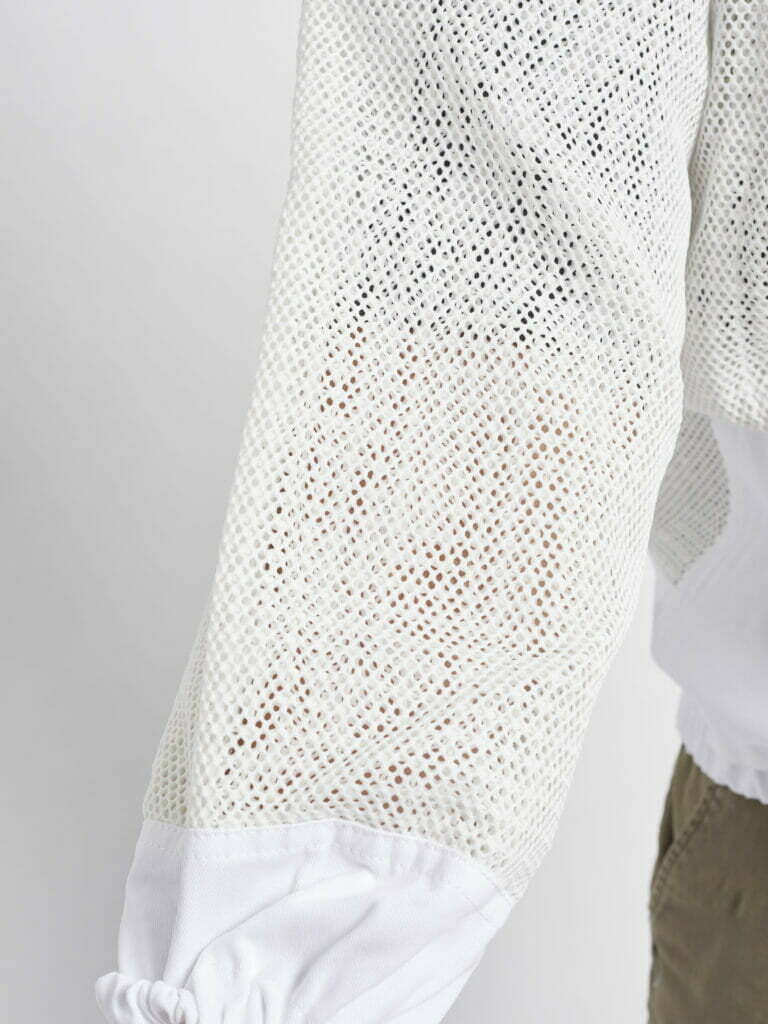
VENTILATED JACKET: More beekeepers are opting for the ventilated option for their primary jacket, over the single-layer cotton jacket. The ventilated jackets are fairly new in the world of beekeeping but have become very popular. Their design is to provide a thick layer of protection by adding several layers of permeable foam or mesh. The mesh allows the air to circulate through the jacket, but the thickness of the material is too dense for a stinger to penetrate.
These types of jackets do cost more, but they are a good value when priced around $100-150 dollars. They shouldn’t cost any more than that. Most backyard beekeepers can get four-plus years out of one of these jackets. A nice thing about these jackets is you can actually wear them without a t-shirt underneath and you’ll stay extra cool during those summer months.
Beware of ventilated jackets that cost less than $80 because the material used is not of good quality. The differences in ventilated material are hard to tell. We put the 3 options side by side here so you can see. We have sold all three options and understand the differences and can really recommend only one of them now. The other two options are not as high quality or as durable.
Beware of ventilated jackets that cost less than $80 because the material used is not of good quality. The differences in ventilated material are hard to tell. We put the 3 options side by side here so you can see. We have sold all three options and understand the differences and can really recommend only one of them now. The other two options are not as high quality or as durable.
Beekeeping Suit
Beekeeping Suit
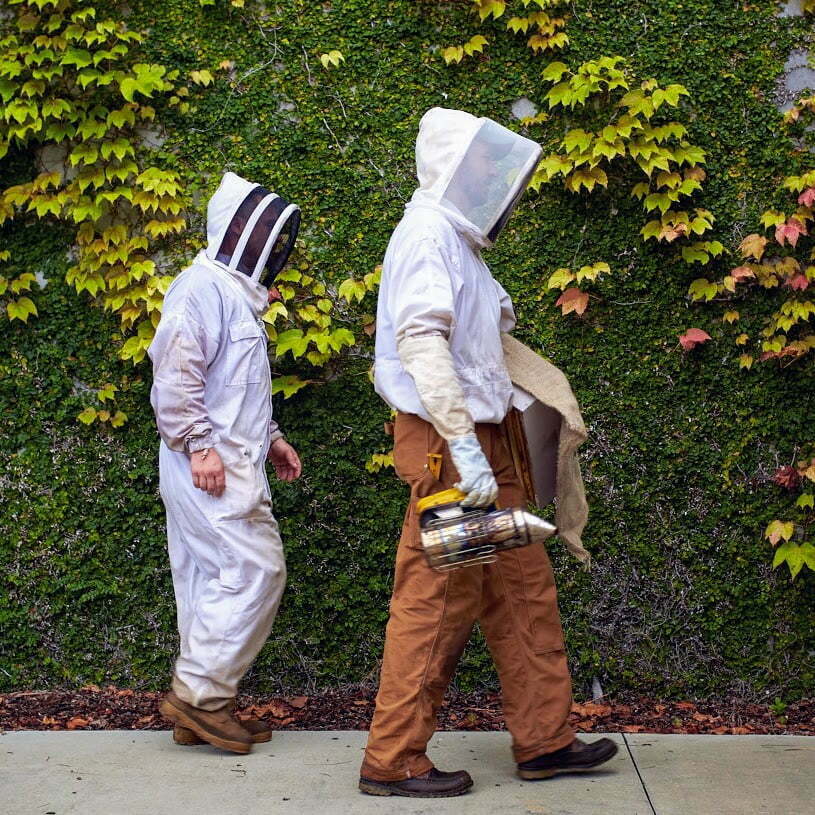
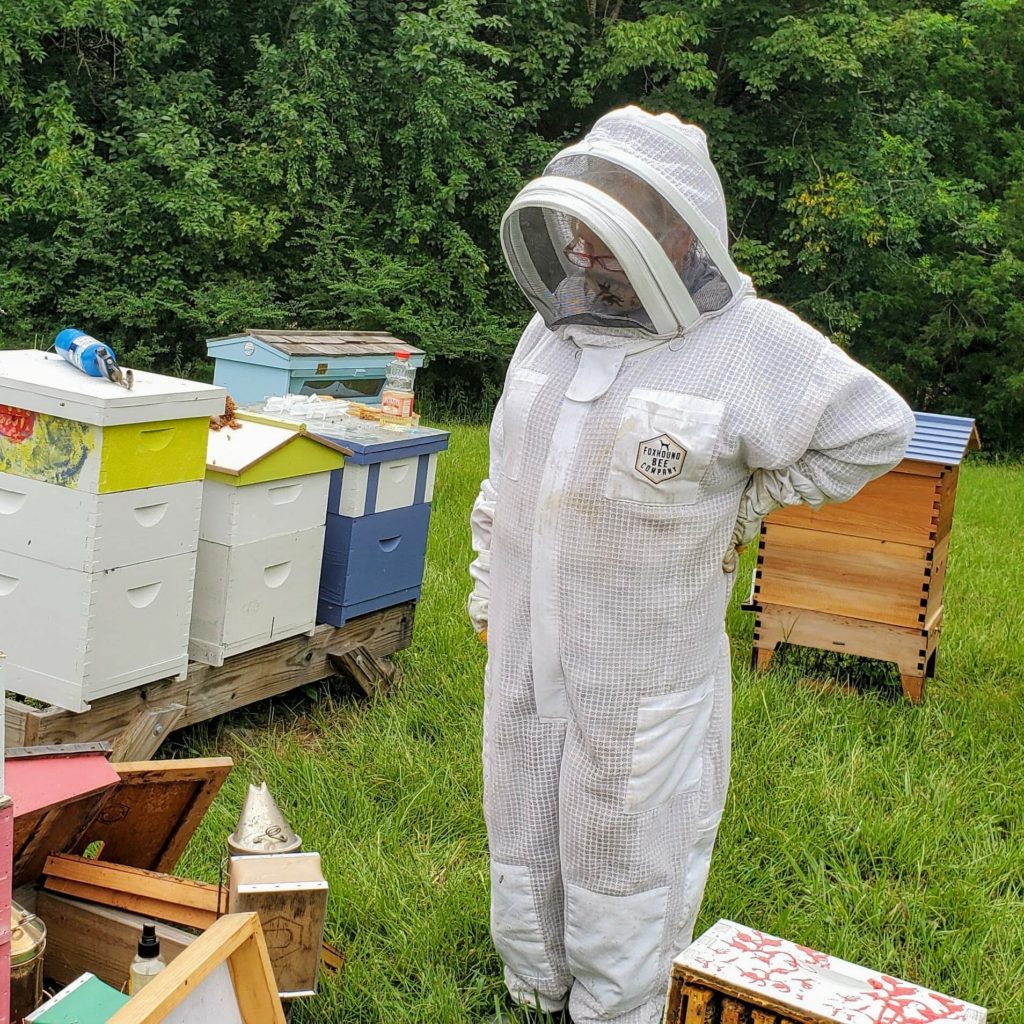
The beekeeping suit refers to the combination of the jacket and the pants. More often than not, the suit is a one-piece design where you put the whole suit on at once. There are options where the pants are separate, but this isn’t as common. Buying the pants separately from the jacket does give you more flexibility vs just the suit, but isn’t common.
The vast majority of beekeepers, probably 70%, use the jacket and not the full suit. The suit is recommended for beekeepers who really want to avoid being stung for whatever reason. There are many good reasons to avoid being stung, but if keeping bees, it should be expected from time to time, no matter the protective gear is chosen. Often times, the stings happen when beekeepers let their guard down (like not zipping on the veil, don’t ask us about that).
When choosing to buy the suit instead of the jacket, we really recommend buying the ventilated option, as the full suit will be very hot. The non-ventilated suit will be even hotter, so opt for the cooler choice.
Buying a full suit instead of a jacket is a good option when buying for kids. Full suits are much easier for kids to wear safely. When introducing kids to bees, it’s important for them to be comfortable.
Beekeeping Veil / Hat
Beekeeping Veil / Hat
The veil allows you to see through your bee suit while still keeping yourself safe from stings. It was only after buying several jackets that we found there was a difference in the veils, and they are not all made the same. When buying your suit or jacket, you want to buy a veil that detaches from it so that it can be washed separately. Veils are best hand-washed to keep the screen from being damaged or bent in the washer.
Your veil will be included with the bee suit or jacket, but it’s wise to give it a little extra thought. There are two different styles, and they both have their beekeepers who love them.
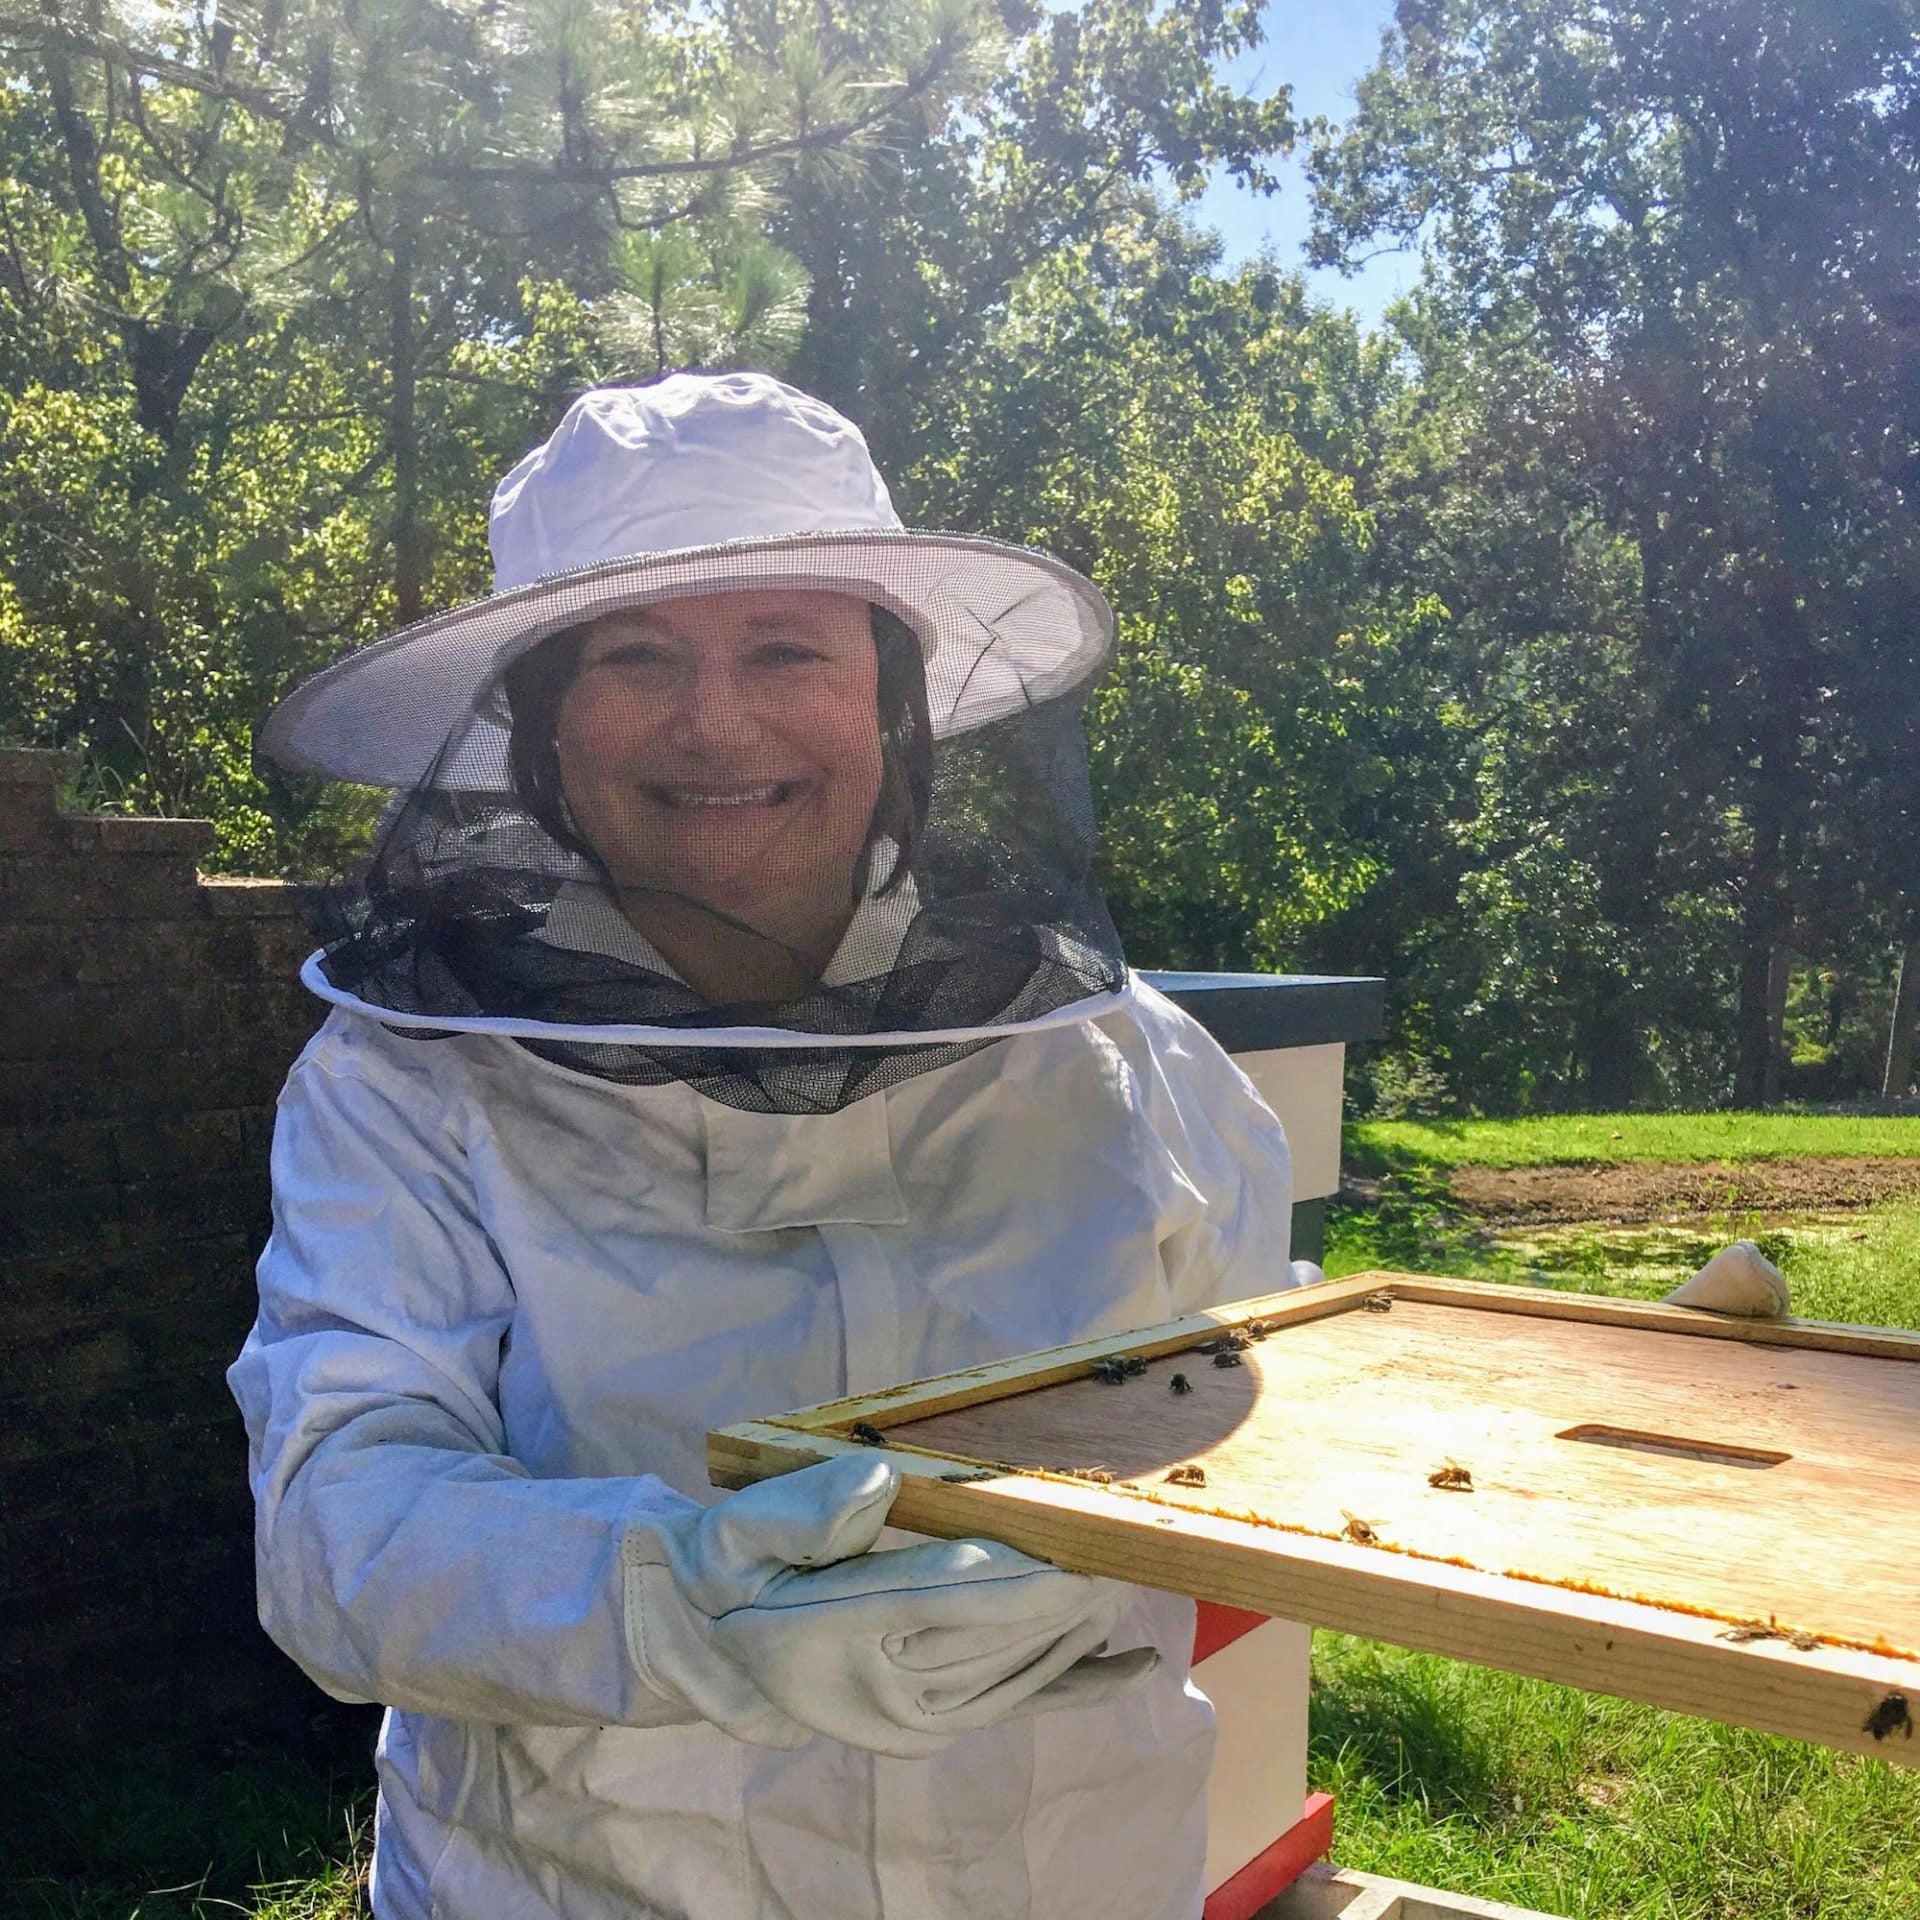
Round Veil
Round Veil
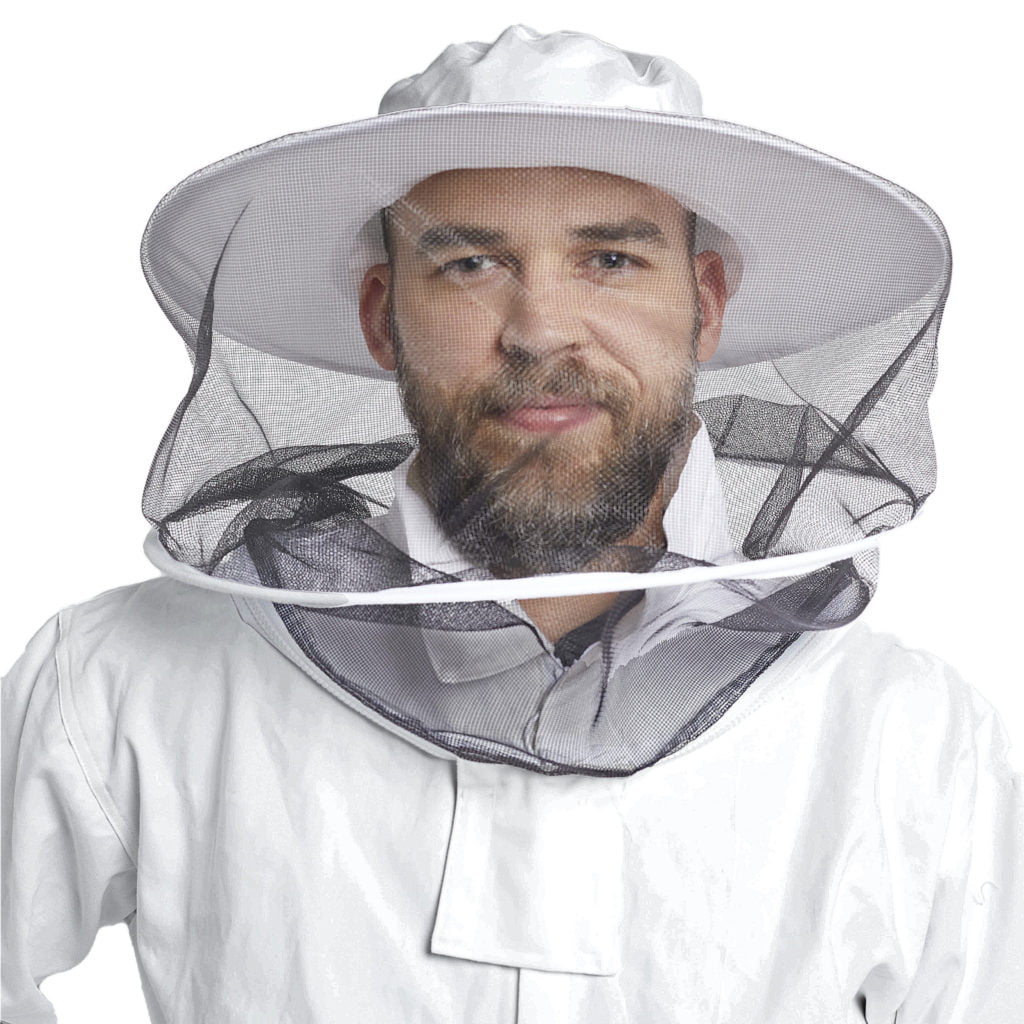
This type of veil looks more like a sombrero with the screen completely surrounding the hat. These are nice for providing extra ventilation and some extra light through the veil. The latter isn’t a big deal but is helpful when the sun is behind you and you are looking at a frame of bees. These are great veils, but if the quality of the screen is poor, the large screen on the veil is an opportunity for it to be torn. This is not the case with a high-quality mesh.
This type of veil looks more like a sombrero with the screen completely surrounding the hat. These are nice for providing extra ventilation and some extra light through the veil. The latter isn’t a big deal but is helpful when the sun is behind you and you are looking at a frame of bees. These are great veils, but if the quality of the screen is poor, the large screen on the veil is an opportunity for it to be torn. This is not the case with a high-quality mesh.
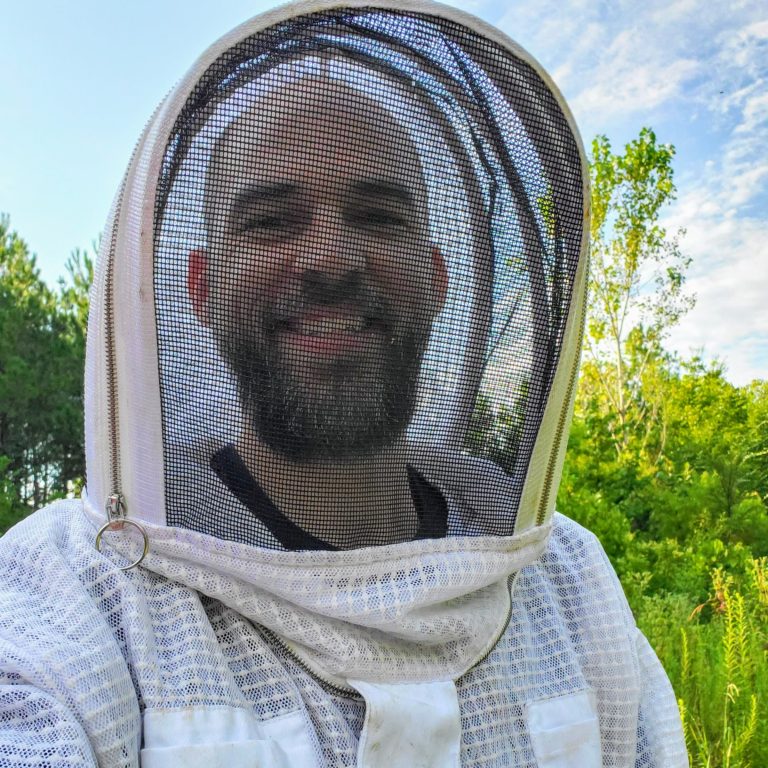
Accordion or Fencing Veil
Accordion or Fencing Veil
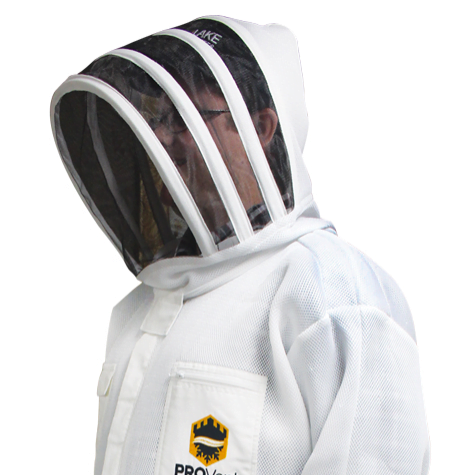
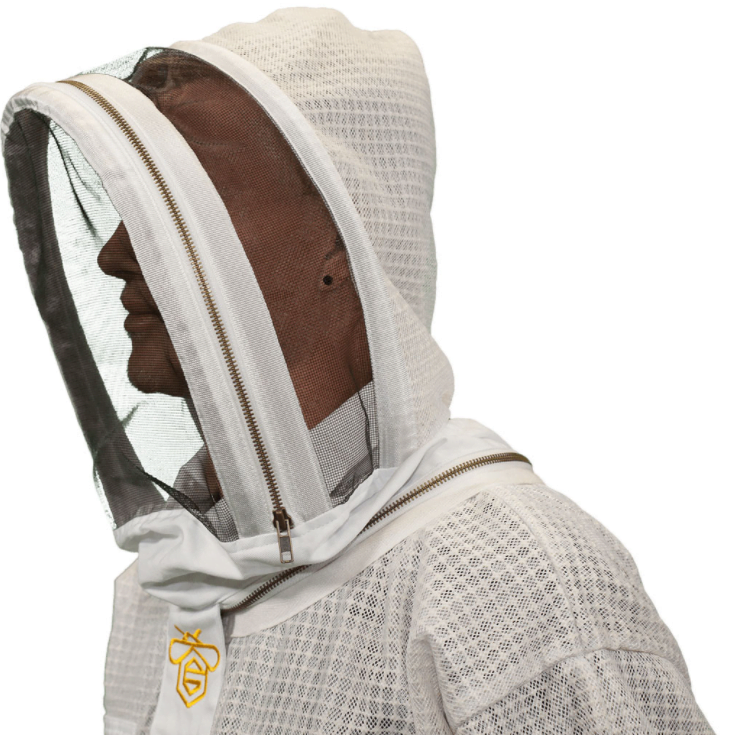
This type of veil is popular because the back of the veil is the same material as the jacket. This type is slightly easier to store than the round veil and has a slightly smaller area so when you turn your head, you don’t have to worry about hitting somebody nearby. This seems pretty minor, but you don’t think about it being an issue until you do it.
This type of veil is popular because the back of the veil is the same material as the jacket. This type is slightly easier to store than the round veil and has a slightly smaller area so when you turn your head, you don’t have to worry about hitting somebody nearby. This seems pretty minor, but you don’t think about it being an issue until you do it.
Bonus Tips
Bonus Tips
The quality of the mesh on the veil makes a difference. The easiest way to think about this is the window screen on a patio or the mesh on a food strainer. There are different colors and thicknesses of the screen material. Some look like fabric and some are obviously a wire mesh. You want the wire mesh ones with strong mesh that doesn’t bend and feels stiff. Take a look at this veil and you can see the mesh resembles more of a fabric than it does a metal screen.
Some of the accordion/fencing veils are designed to have the screen different distances from your nose. I didn’t realize this until it was too late when I bought a jacket with a GIANT veil. The veil was so far in front of my face it was cumbersome.
You also don’t also want the screen too close to your face because of the bee that gets a little too motivated and stings the tip of your nose. When buying a veil, take a look at how it looks on the model, so you can get an idea of how close it would be to you.
Hive Tool For Beekeeping
Hive Tool For Beekeeping
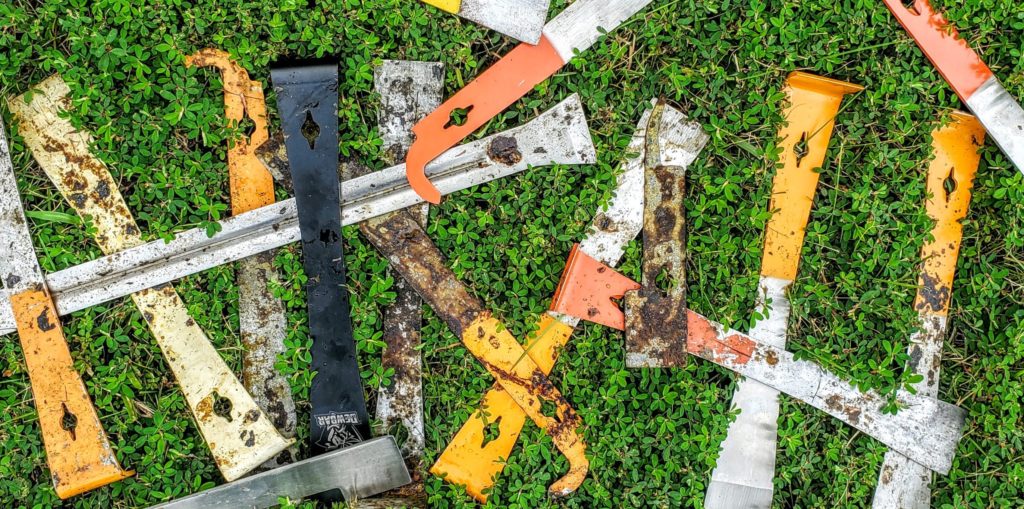
The hive tool to a beekeeper is the same as a stethoscope to a doctor; no beekeeper or doctor would go to work without one. I can’t overstate how important a hive tool is to a beekeeper. It may not be obvious immediately, but over time, bees will coat parts of the inside of the hive with a sticky resin called propolis. When they do this, it’s nearly impossible to open the hive and remove the frames without the hive tool.
One time I was out visiting a group of hives to do a lot of intensive work, only to realize I forgot my hive tool. In complete inspiration, I ended up using the pointed side of a tire iron to do as much as I could. Now, I have two hive tools and leave one at every location where there are bees.
There are a lot of options for hive tools, each with different little features that beekeepers may or may not find helpful. There is a standard hive tool that about 80% of beekeepers use and you can’t go wrong with that one. The good news is that because you’ll need to get two hive tools in case you lose one, you can get two different types and try each one for yourself.
Lit bee smoker before opening a hive
Bee Smoker For Beekeeping
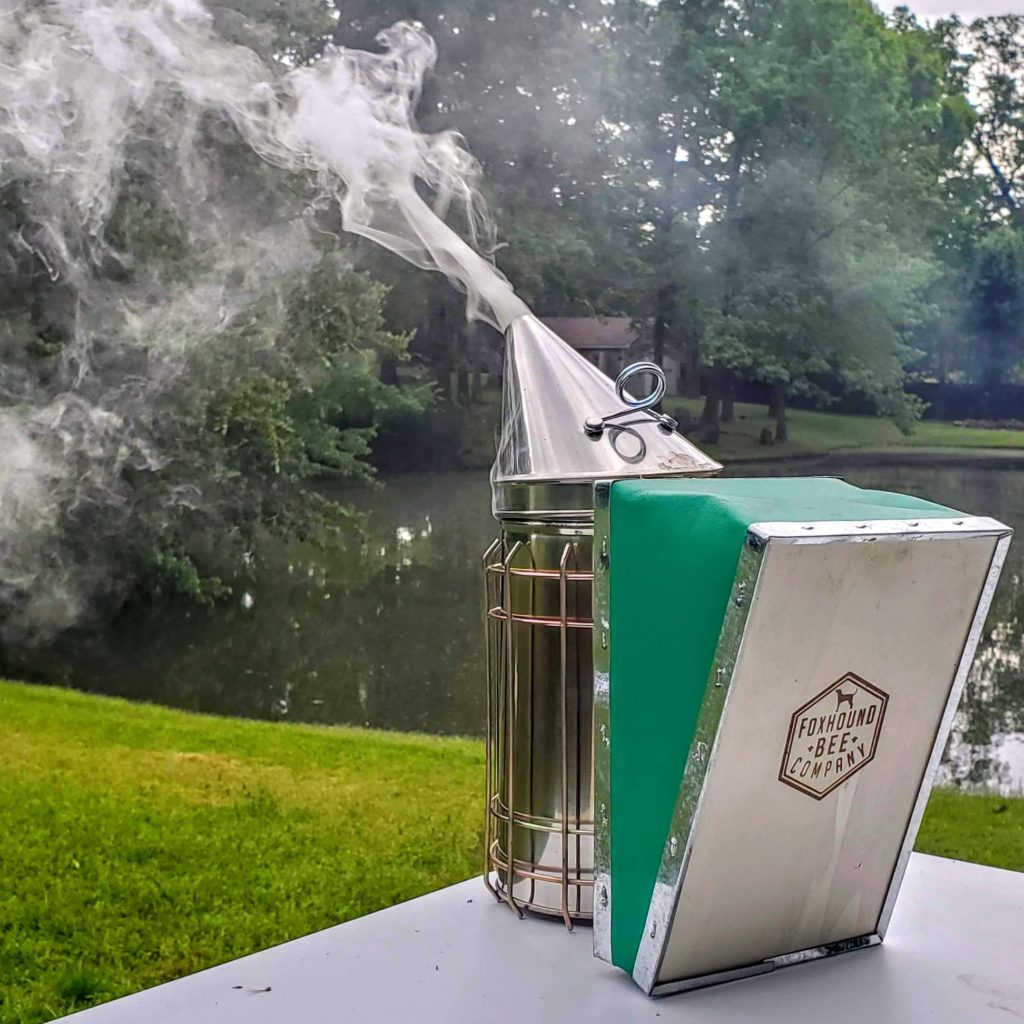
The bee smoker is used nearly every time a beekeeper opens up their hive. The smoke produced essentially calms the bees down and makes them less defensive. The bees will actually preoccupy themselves with feeding on honey and generally ignore the beekeeper. The effect of the smoke doesn’t last forever, typically long enough for the beekeeper to so whatever needs to be done.
All smokers work the same (probably not all, but I’ve never seen a smoker used that doesn’t work this way). Smokers have a vertical chamber filled with some type of smoker fuel (pine straw, cardboard, wood chips, etc..) that is used to produce the smoke. Near the bottom of the chamber is a little platform used to keep the fuel off the bottom of the chamber so air can easily be pumped in from the bellow.
Lighting a smoker is a learned art and one of the skills that is developed over time. Watching how experienced beekeepers like their smoker and practicing is the key to doing it right.
The bellow pushes in air through the bottom, through the smoker fuel, and up and out of the top. There are a few different options and differences in quality from one smoker to the other, but they all work the same. Lighting and keeping a smoker going is a learned skill and part of the fun part of beekeeping.
The bellow pushes in air through the bottom, through the smoker fuel, and up and out of the top. There are a few different options and differences in quality from one smoker to the other, but they all work the same. Lighting and keeping a smoker going is a learned skill and part of the fun part of beekeeping.

Types Of Bee Feeders
Types Of Bee Feeders
I wish that we didn’t have to feed bees sugar syrup and they were able to survive on their own, but for first-year hives, it’s essential to their survival. Once a colony gets into its 2nd and 3rd year, it may not be essential to feed bees sugar syrup. It’s extremely helpful, however, for any first-year hive or a newly captured swarm of bees or anything similar.
Opinions on how, when, why, what, etc. to feed your bees are everywhere, but we aren’t focusing on that. Right now, we are just talking about the equipment used to feed bees. For the vast majority of backyard beekeepers, these are the feeding options used.
Boardman Feeders / Entrance Feeders
Boardman Feeders / Entrance Feeders
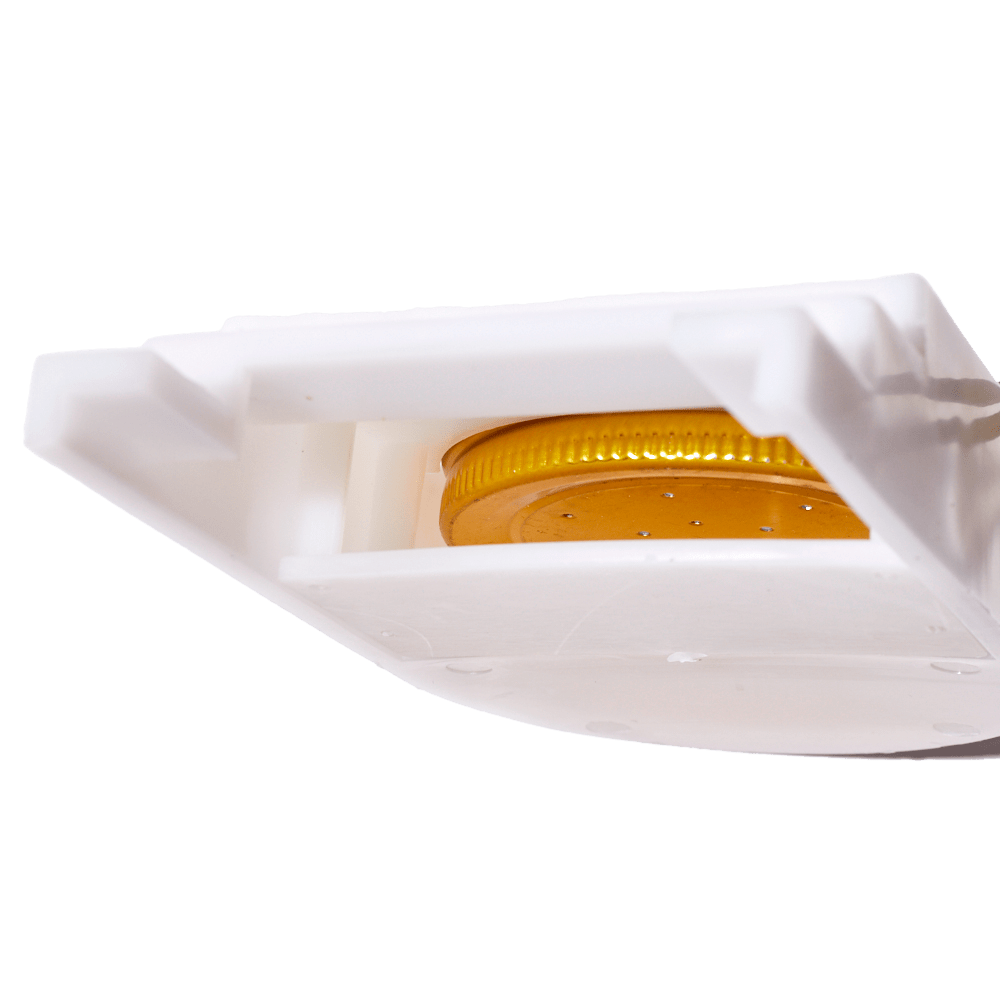
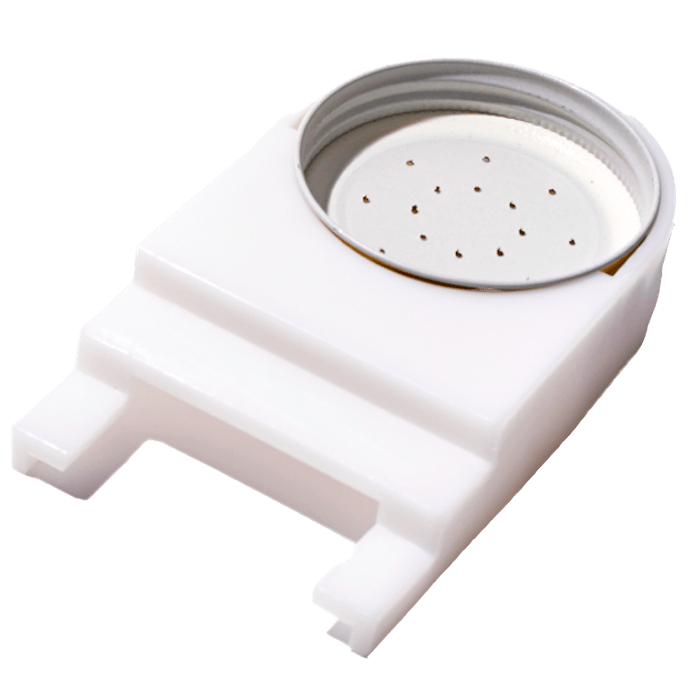
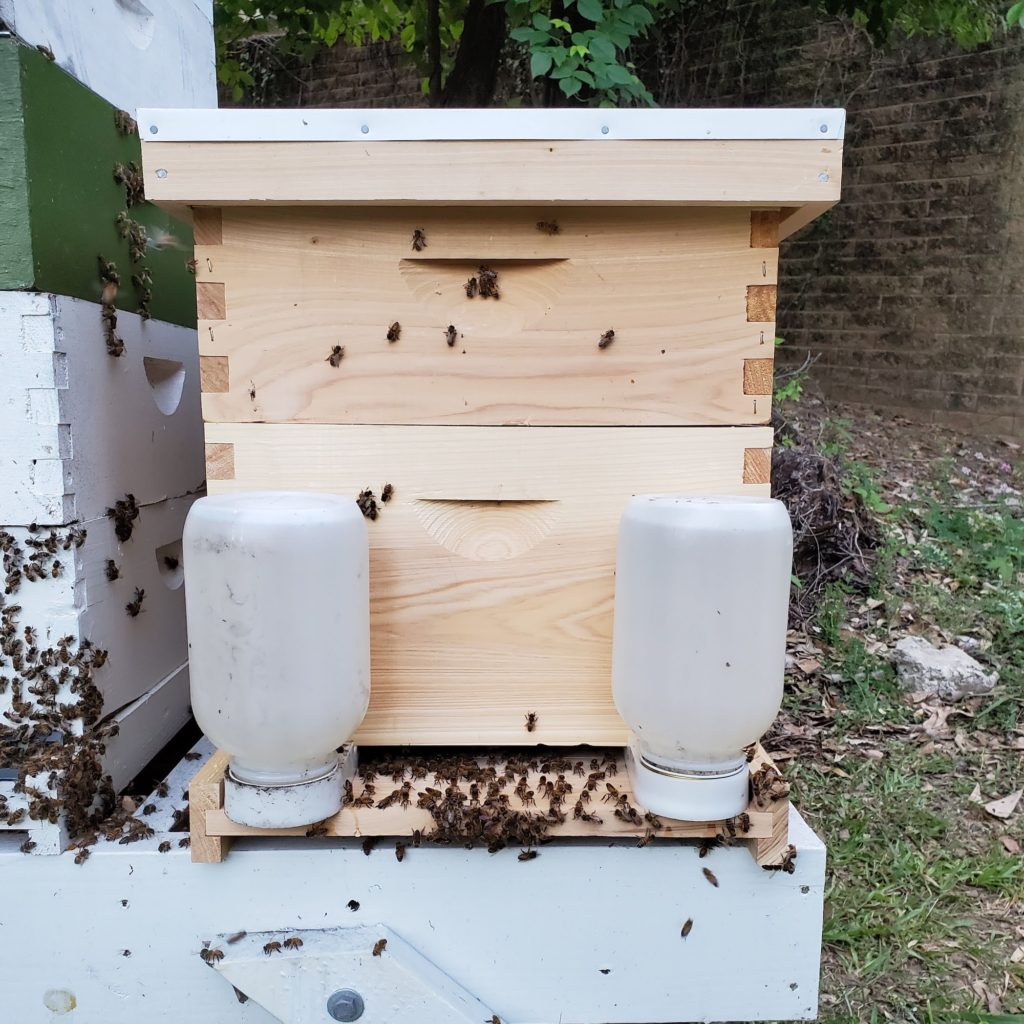
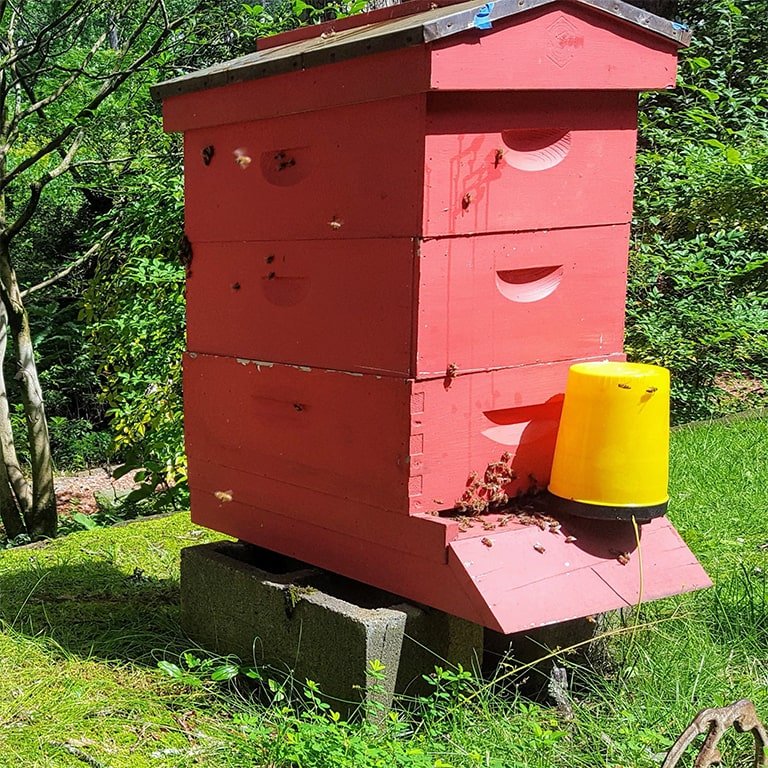
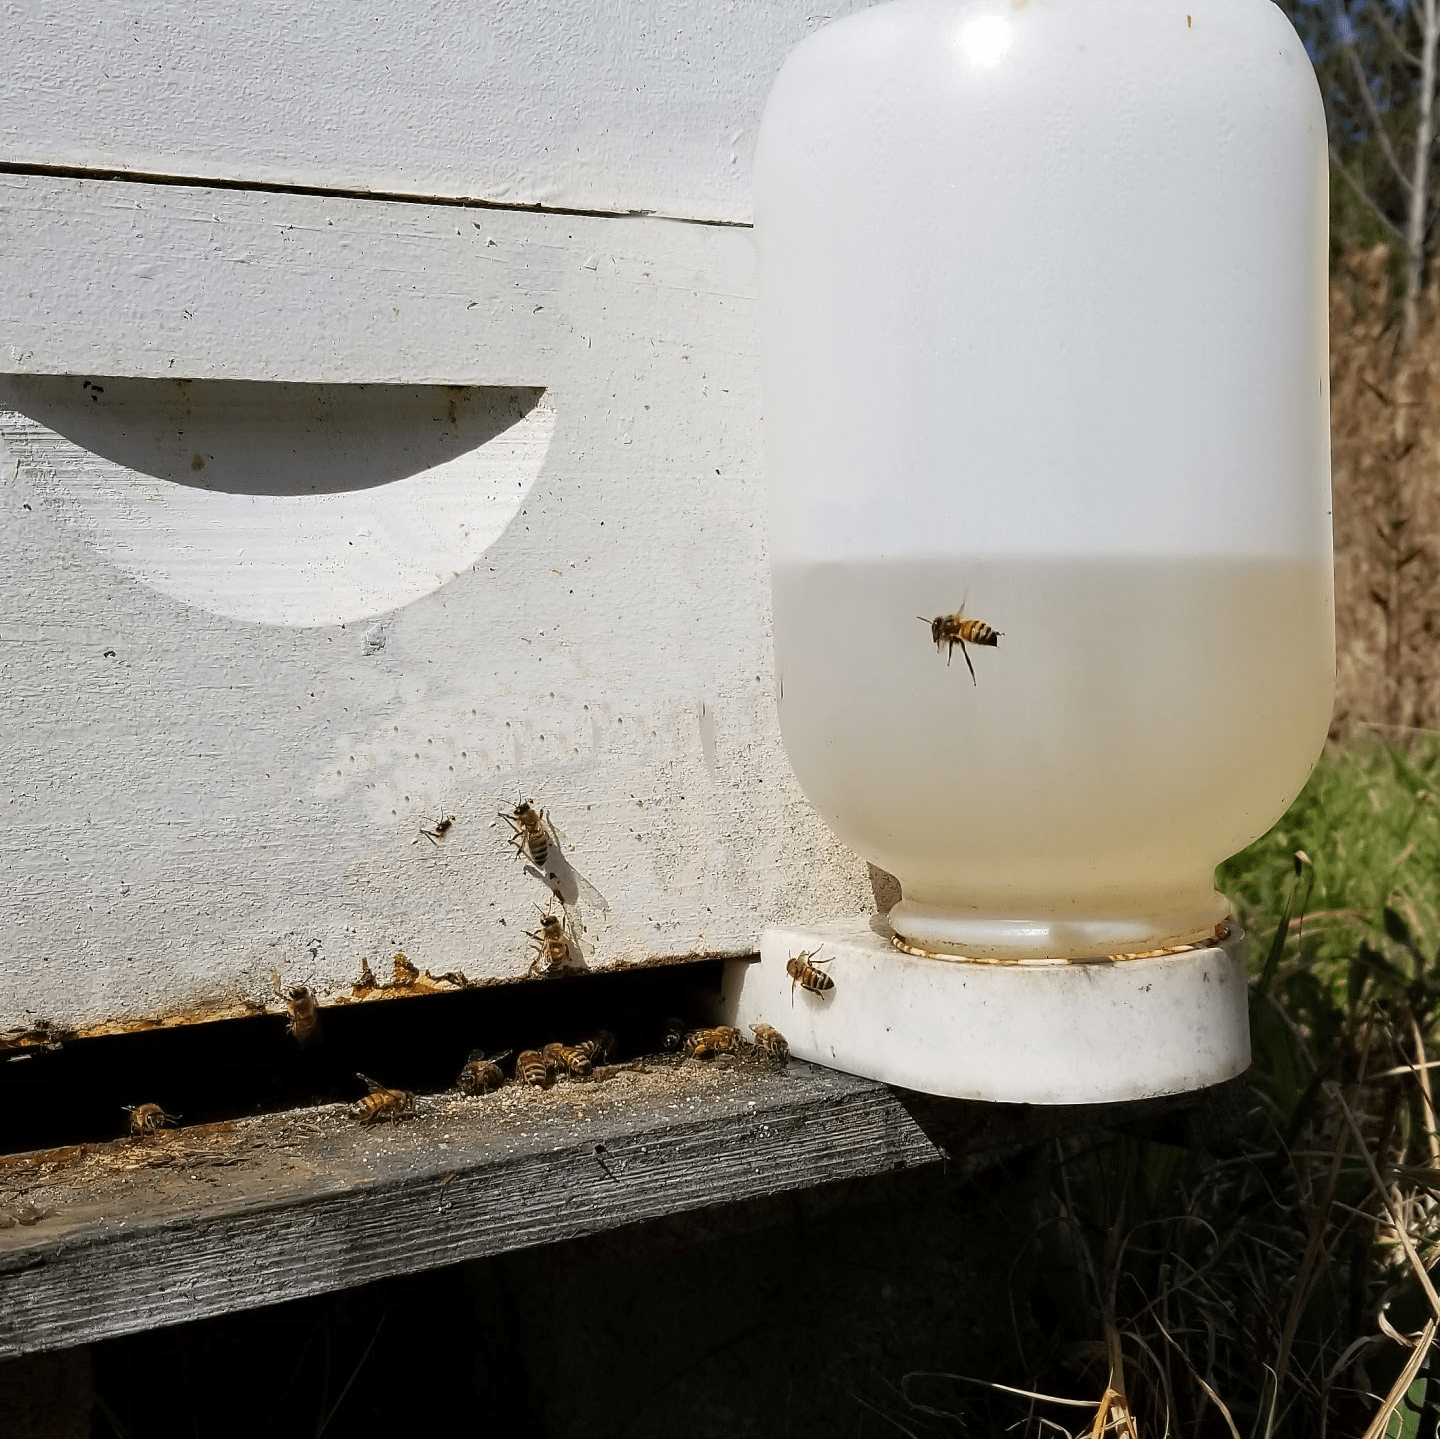
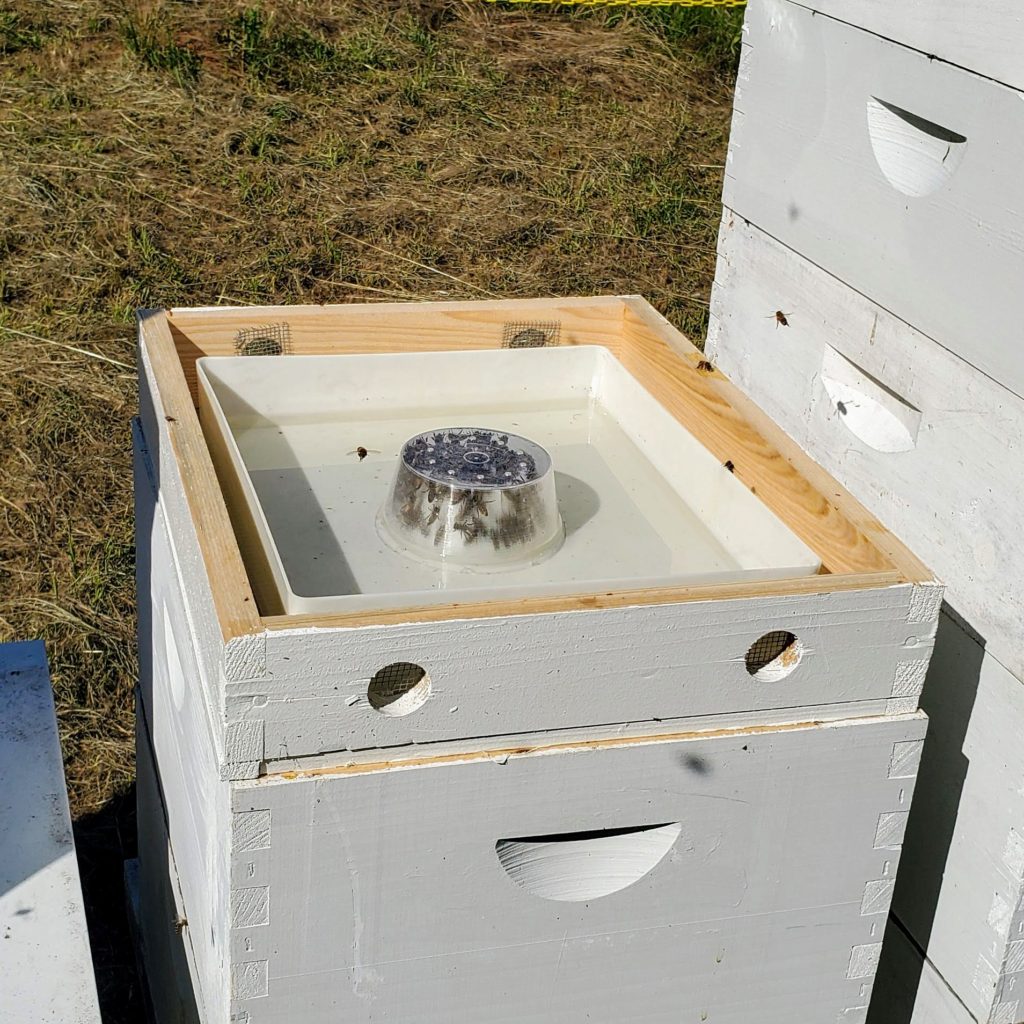
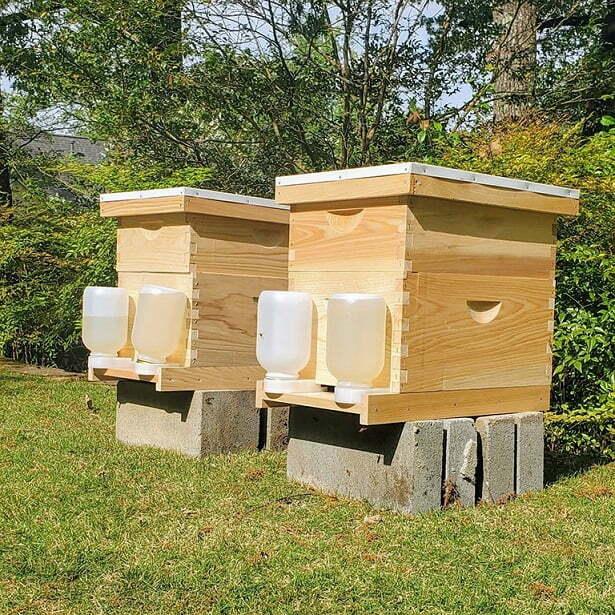
These Boardman feeders and entrance feeders are the same thing and are the most common type of feeder you will see. There are a couple of variations on the style, but they typically work by sliding a tray into the gap in the entrance of the hive. The tray supports a container with a mason jar sized lid upside down. The lid on the jar has tiny holes in it that the bees feed through.
Many beekeepers think these work by dripping sugar syrup into the tray, but the jar actually creates a vacuum and if sealed correctly won’t drip any syrup. When working as designed, the bees actually have to push their tongues into the holes to feed.
Entrance feeders are inexpensive and you can actually put multiple feeders in the entrance at once.
The most negative aspect of these feeders is that the bees can consume a quart jar of syrup in 1-2 days, so they require more frequent visits to refill. This alone can be inconvenient if you have to drive to check on your colonies.
The standard jar for these feeders is a 1-quart jar, but if you use half-gallon jars, these feeders work extremely well for the backyard beekeeper.
Top Feeders And Internal Feeders
Top Feeders And Internal Feeders
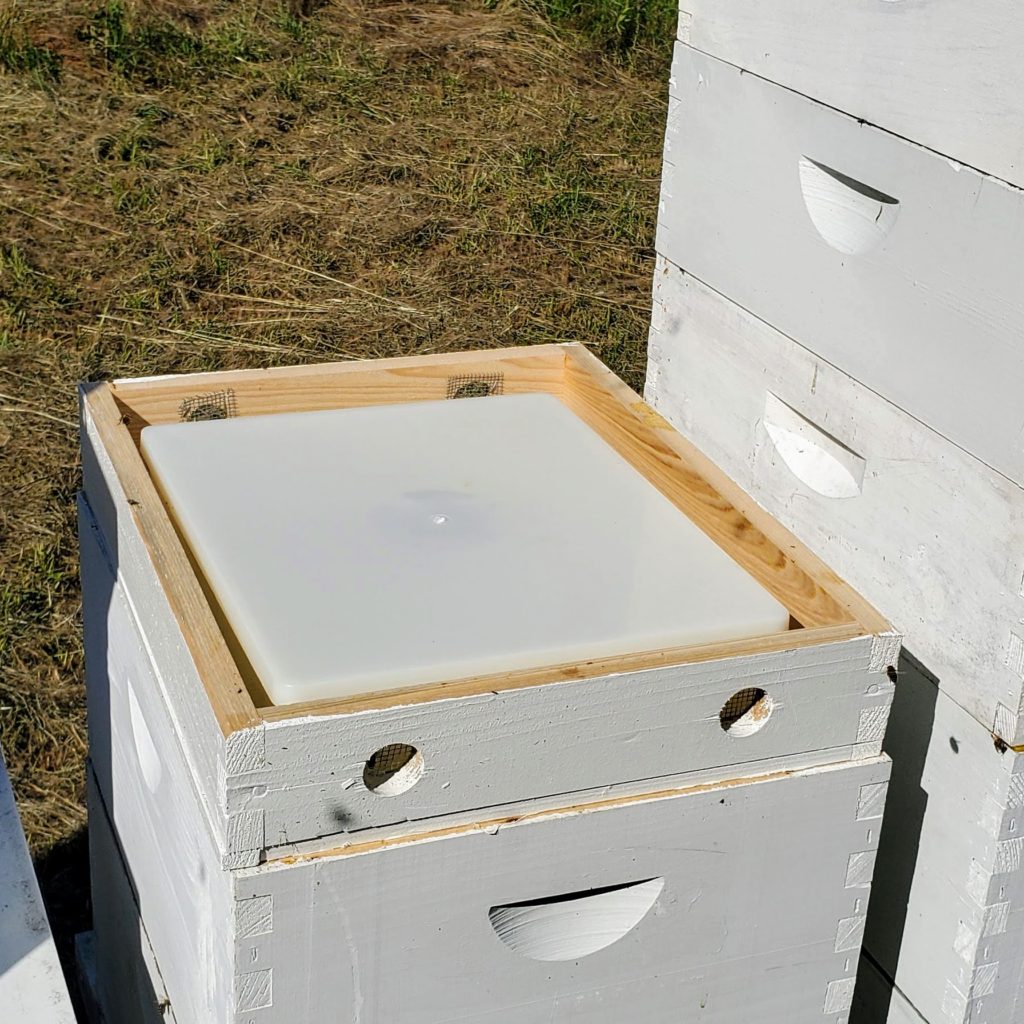
There are a lot of different versions of these types of feeders, and they are the 2nd most popular style after the Boardman feeder. Top feeders sit on top of the hive and usually inside the hive so that the bees can have full access to the syrup but are still protected from rain, other bees, sun, etc. These feeders are popular because they typically hold more syrup in them than the Boardman feeders, requiring fewer visits to refill the container.
The variety of designs in these top feeders stems from the problem of drowning bees. With large containers of syrup inside the hive, bees have a knack for getting into spaces where they are not supposed to be and end up drowning. It’s disheartening to go check on a colony only to find several hundred bees who got stuck in the top feeder.
Usually, a little tweaking or modifying of the feeder will reduce the drowning. Lately, there have been some really great designs out there for top feeders that significantly reduce the risk of drowning.
Where Do I Buy Beekeeping Supplies?
Where Do I Buy Beekeeping Supplies?
Buying beekeeping supplies can be a little confusing because there are so many options available. There are even more options for places to buy supplies from. It can be difficult to make sense of who to buy from. Some have a great website but terrible reviews on Google; others with terrible websites but have been around a long time.
You can even buy full-size kits from Amazon, but they seem too good to be true (hint: most are very cheap Chinese-made boxes from companies with zero or extremely poor customer service). Here is an Amazon tip, to know who you are actually buying from, click the “Sold by ________” next to the listing. It will show the address of the company, and most are Chinese.
Fortunately, there are some really great American companies you can buy from that we recommend. Disclaimer: we sell high-quality beekeeping supplies, which is how we have built our business. We would love your support!
When we teach our classes, we always tell our students about other places to buy beekeeping supplies besides ourselves. We know maybe this isn’t the best “financially”, but we want our students( and you) to buy supplies from the best option for them. We listed a few of the major suppliers below so you can get an idea of who the major players are in the beekeeping supply industry.



The Three Most Popular Types Of Hives
The Three Most Popular Types Of Hives
Langstroth Hives
Langstroth Hives
The Langstroth beehive is the American standard of beehives and is what you imagine when you see a stack of white boxes in a field. The design was made popular by a guy named Lorenzo Langstroth who figured out that bees need a very precise amount of space to move around in the hive to be happy and for the beekeeper to still be able to easily inspect the hive.
The Langstroth beehive is the American standard of beehives and is what you imagine when you see a stack of white boxes in a field. The design was made popular by a guy named Lorenzo Langstroth who figured out that bees need a very precise amount of space to move around in the hive to be happy and for the beekeeper to still be able to easily inspect the hive.
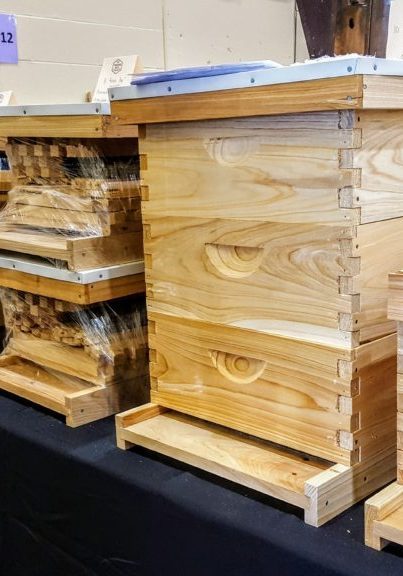
This type of beehive is the most popular, but that doesn’t necessarily mean that it is the best option for you. It is the design that we use in our apiary (bee yard), so it is what we know best. We have used other types like the top-bar hive as well that work well for certain beekeepers. Because the Langstroth hive is the most popular, they have the most options for them like feeders, pest control devices, and honey harvesting tools.
The Langstroth is expandable by stacking up additional boxes during the spring and summer when bees need more room to store honey. Removing the extra boxes and reducing the size of the hive when bees are more dormant in the winter is easily accomplished.
The disadvantage of Langstroth hives is the weight involved when moving boxes. If the stack of boxes is 3 high, to look in the bottom box, the two top boxes must be removed. Each box can easily weigh 40+lbs.
Langstroth Boxes
Langstroth Boxes
The boxes are what make up the structure of the beehive and what you see from the outside of the hive. The box is what helps keep the colony of bees insulated and protected from the environments. It makes the hive more defensible against predators like other bees and helps mimic the cavity that bees prefer to build their colony inside of. Think hollow tree.
The boxes are what make up the structure of the beehive and what you see from the outside of the hive. The box is what helps keep the colony of bees insulated and protected from the environments. It makes the hive more defensible against predators like other bees and helps mimic the cavity that bees prefer to build their colony inside of. Think hollow tree.
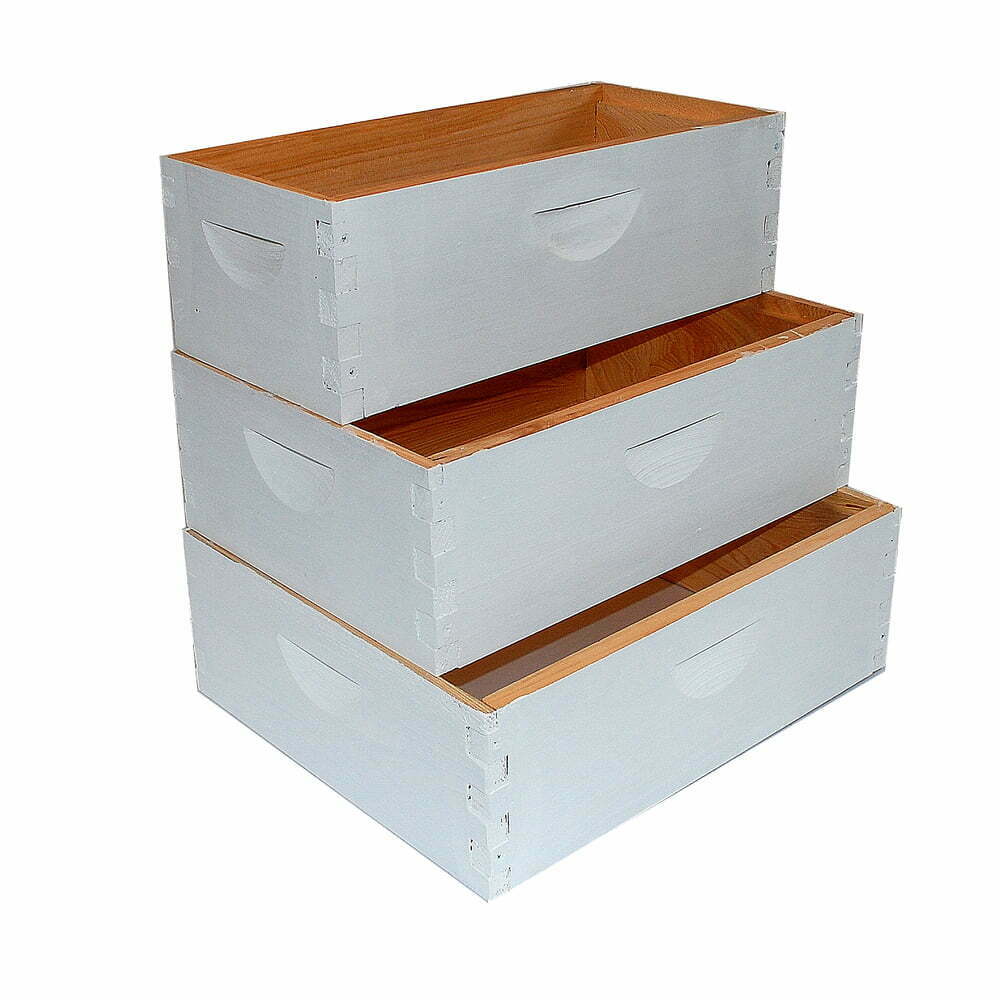
3 medium boxes stacked without frames, 10, 8 and 5 frame
A lot of various materials are available for the box, ranging from wood (the most popular) to polypropylene boxes that are not as common. There are even styrofoam boxes available too!
The boxes are great for the bees, but also for the beekeeper. The different sized boxes make it possible to remove pieces of the hive to inspect more easily. The boxes can be transported from one colony to another if necessary and are reusable.
Inside each box is a special cut that allows the frames to neatly fit inside the box. This cut is what makes a bee box a bee box. Without it, it is just a regular box without a top and a bottom.
The boxes come in multiple options:
deep, medium, or shallow (refers to the height of the box)
10 frame, 8 frame, or 5 frame (refers to the width of the box / how many standard frames it can hold)
Read more about using deep and medium boxes for your bee hive
Langstroth Frames
Langstroth Frames
The frames are the pieces inside of the boxes that support the sheet of comb the bees will do all their work in. The majority of a beekeeper’s time inside a beehive is removing, holding, and inspecting these frames. These are what make up the entire interior of the beehive with each one spaced just right inside the hive so the bees can build inside of them, but are still removable by the beekeeper.
The frames are the pieces inside of the boxes that support the sheet of comb the bees will do all their work in. The majority of a beekeeper’s time inside a beehive is removing, holding, and inspecting these frames. These are what make up the entire interior of the beehive with each one spaced just right inside the hive so the bees can build inside of them, but are still removable by the beekeeper.
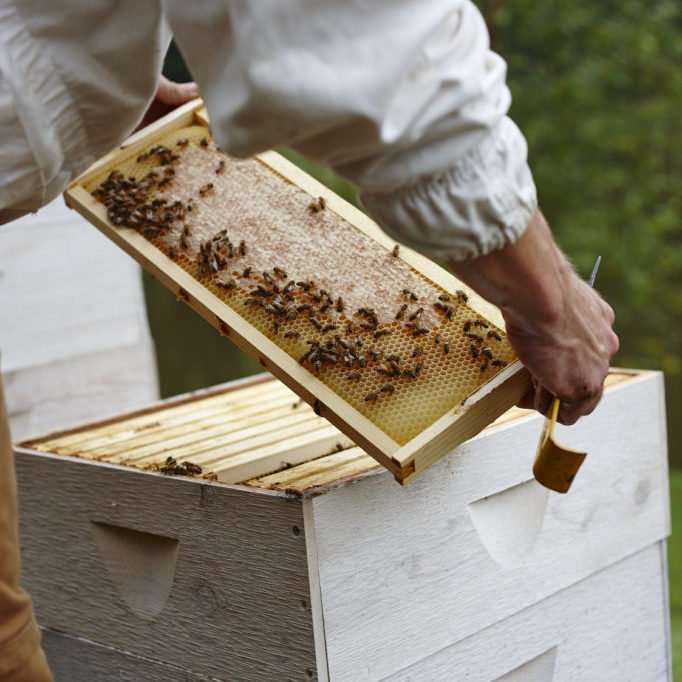
Inspecting a medium frame from a 10 frame medium box
Traditionally, frames are made from wood and each frame is designed to either fit a sheet of plastic foundation or a sheet of beeswax foundation. More on that later. On this foundation is where the bees will actually build their hexagons.
Each wooden frame comes with 4 pieces that fit together with glue and nails: top bar, bottom bar, and 2 sidebars. These are the names of the pieces of the frames, but each has its own variations which can get complicated.
Standard frames come in three different heights which match the height of the box they are going in.
Deep frames = deep box
Medium frames = medium box,
Shallow frames = shallow box.
You can’t put deep frames in a medium box and you really don’t want to put medium frames in a deep box (trust us), so make sure your frames match the box. Each box holds a certain amount of frames, and you need that many frames to go into the box. You should not put 5 frames in a 10 frame box, and you can’t put 9 frames in an 8 frame box.
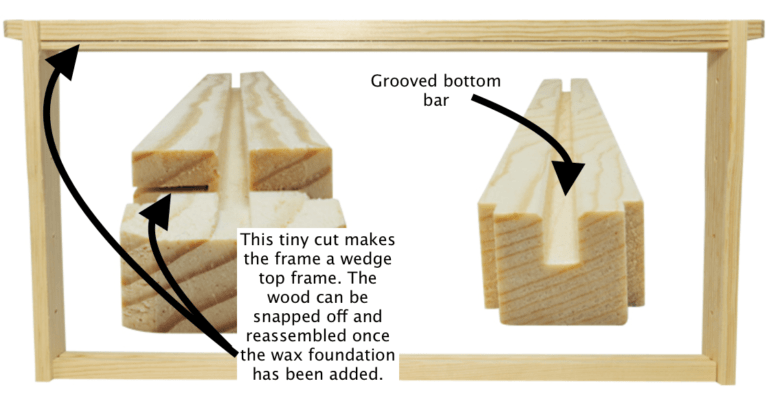
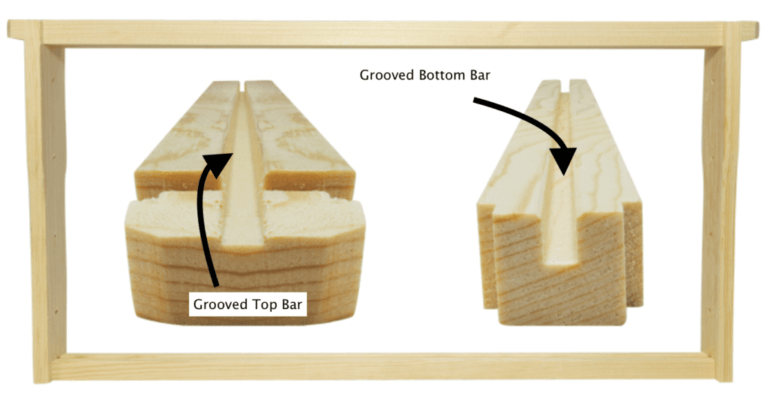
When shopping for frames, you’ll see some terms like grooved and wedge and WT, GT, GB. These refer to the unique differences in the frames and what makes them work with a specific type of foundation. The type of foundation you choose will dictate the type of frame you use. So when choosing beekeeping equipment, choose the foundation and find the frame that fits it.
Grooved Top and Grooved Bottom frames are typically used with a beeswax coated plastic foundation.
Wedge Top / Grooved Bottom frames are typically used with a 100% beeswax foundation.
Foundation
Foundation
The foundation inside a frame serves as the structure for the bees to build their comb on. With most frames, the sheet of 100% beeswax or beeswax coated foundation is the 5th part added to the frame before giving it to the bees. The foundation is imprinted with hexagons the bees will use to make a very neat, clean group of hexagon cells. In these cells is where the bees will store their honey and pollen, the queen will lay eggs, and where they climb inside to help stay warm.
The foundation inside a frame serves as the structure for the bees to build their comb on. With most frames, the sheet of 100% beeswax or beeswax coated foundation is the 5th part added to the frame before giving it to the bees. The foundation is imprinted with hexagons the bees will use to make a very neat, clean group of hexagon cells. In these cells is where the bees will store their honey and pollen, the queen will lay eggs, and where they climb inside to help stay warm.
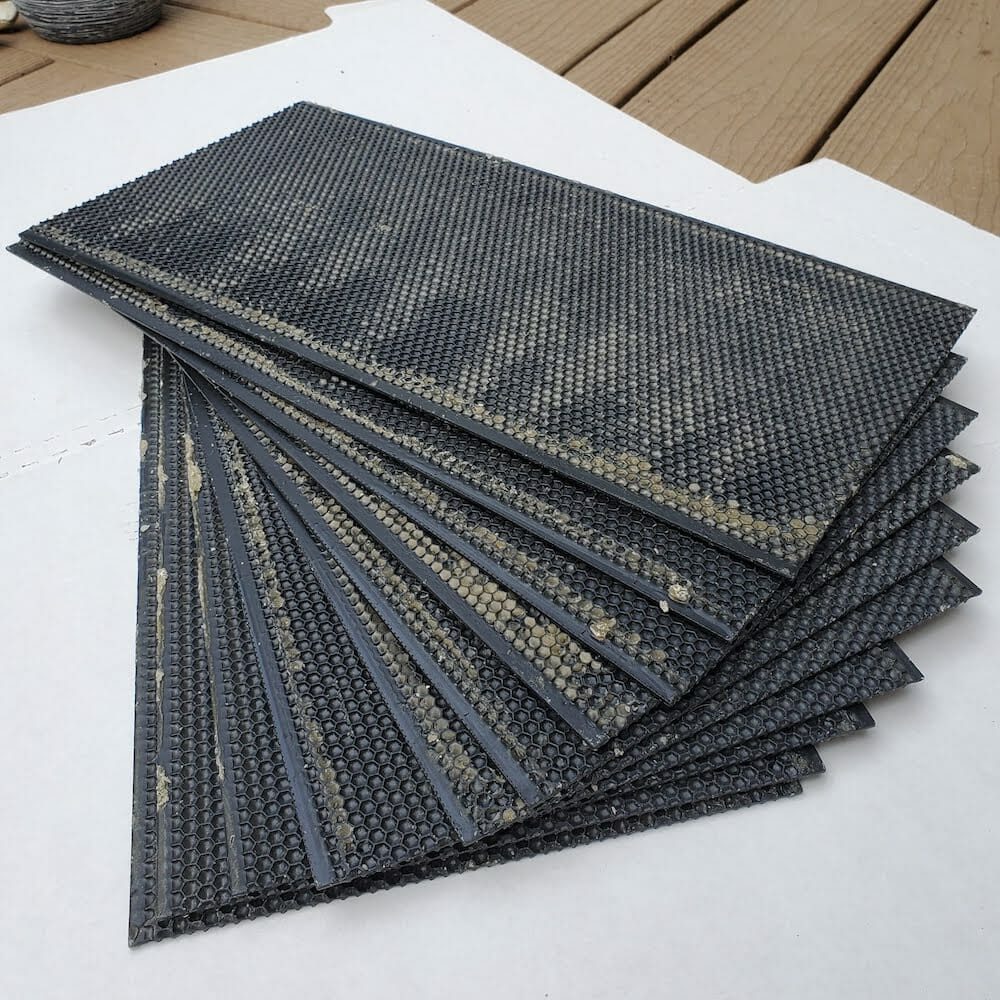
Plastic, medium foundation with extra wax
Foundation is reusable year after year by the bees and by the beekeeper. Without question, once the bees form their comb on top of the foundation, it becomes the most valuable part of the hive to the beekeeper. The sheets of foundation give the bees a strong structure to build their comb on, and the frame can safely protect the comb from being damaged during inspections.
Each sheet of foundation comes with thousands of hexagons molded into it on both sides. The bees will “draw out” or form a hexagon-shaped container on top of the molded hexagon, using the mold as a guide. Honestly, the bees don’t need help figuring out how to make a hexagon. The imprinted hexagons do help the bees make more uniform cells, which are more desirable to the beekeeper. When left to their own devices, bees will make hexagon-shaped cells in a wide variety of sizes which is perfectly fine. It is just not preferred by the beekeeper.
Foundation comes in sizes to match the frames. Deep foundation = deep frame, medium foundation = medium frame, shallow foundation = shallow frame. It also comes in the form of 100% beeswax and beeswax coated plastic.
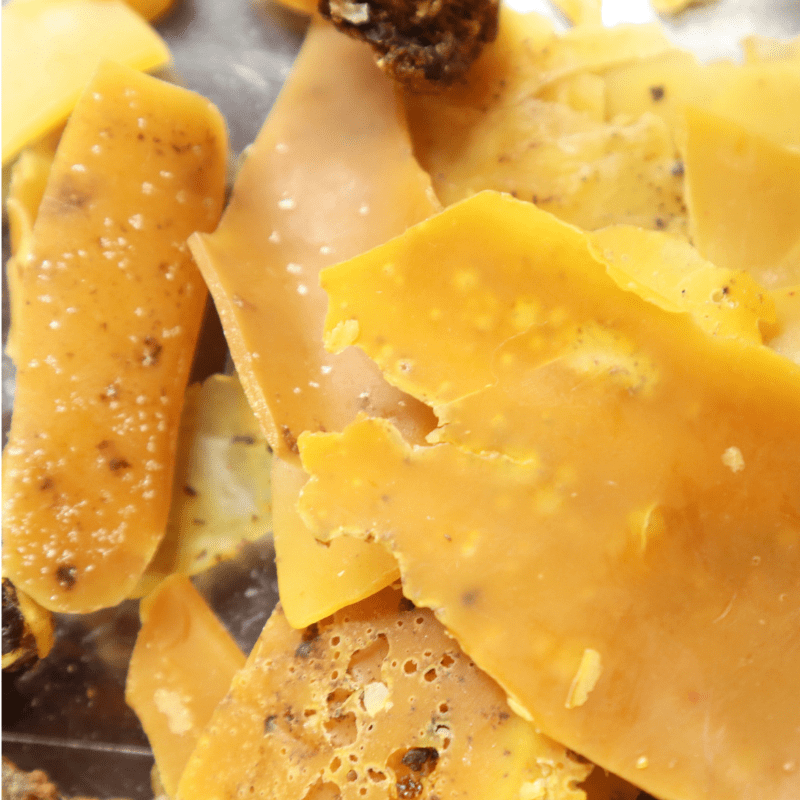
Bulk beeswax to be filtered for foundation
100% Beeswax foundation
Beeswax foundation is the original foundation used and is a very popular option with beekeepers. It certainly has its advantages, primarily because it is made from what the bees make naturally themselves. If you have ever seen a beeswax rolled candle with the hexagons on it, you were holding a sheet of 100% beeswax foundation. Sometimes those candles are dyed certain colors like green or bleached white, but yellow is their natural color.
This is the type of foundation that is most preferred by honeybees compared to plastic foundation. It can be very difficult to install into a frame as it breaks easily, especially when cold. The bees will add their own beeswax to the beeswax foundation to form all the cells on the foundation.
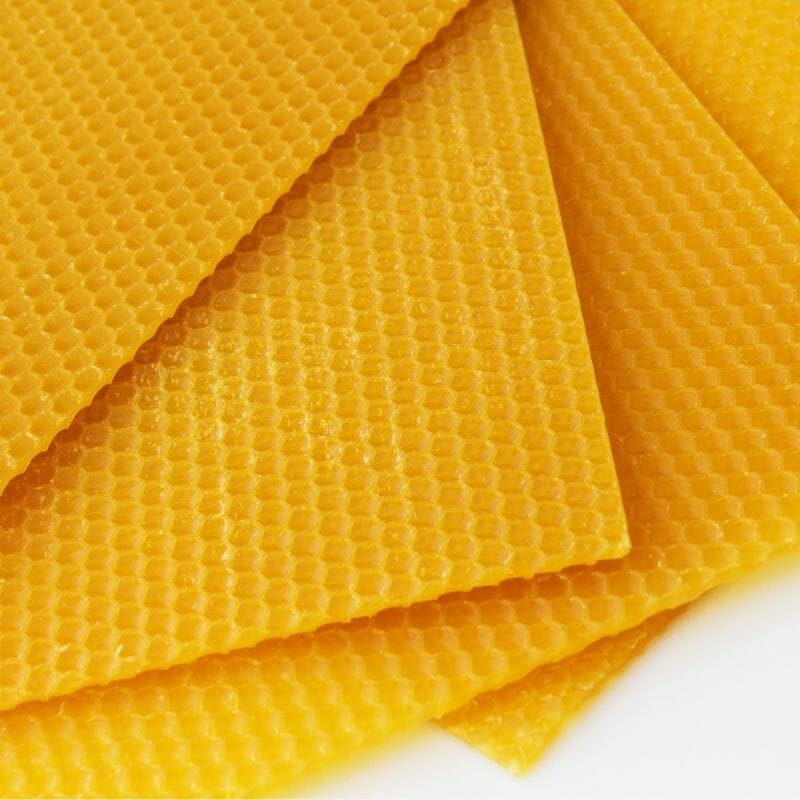
100% beeswax foundation
Beeswax foundation is made when companies like Dadant buy bulk beeswax from mostly commercial beekeepers and remelt it into foundation sheets they can resell back to beekeepers.
The main negative of this is there are many pesticides and diseases that can live in the wax. The beeswax is melted in large batches when reformed, so when you buy beeswax foundation, you are possibly getting some trace amounts of harmful chemicals.
When buying a 100% beeswax foundation, it will often come with wires or hooks in it. The vertical and horizontal wires in the foundation are there to provide extra support to keep it from collapsing under the weight of the bees and honey.
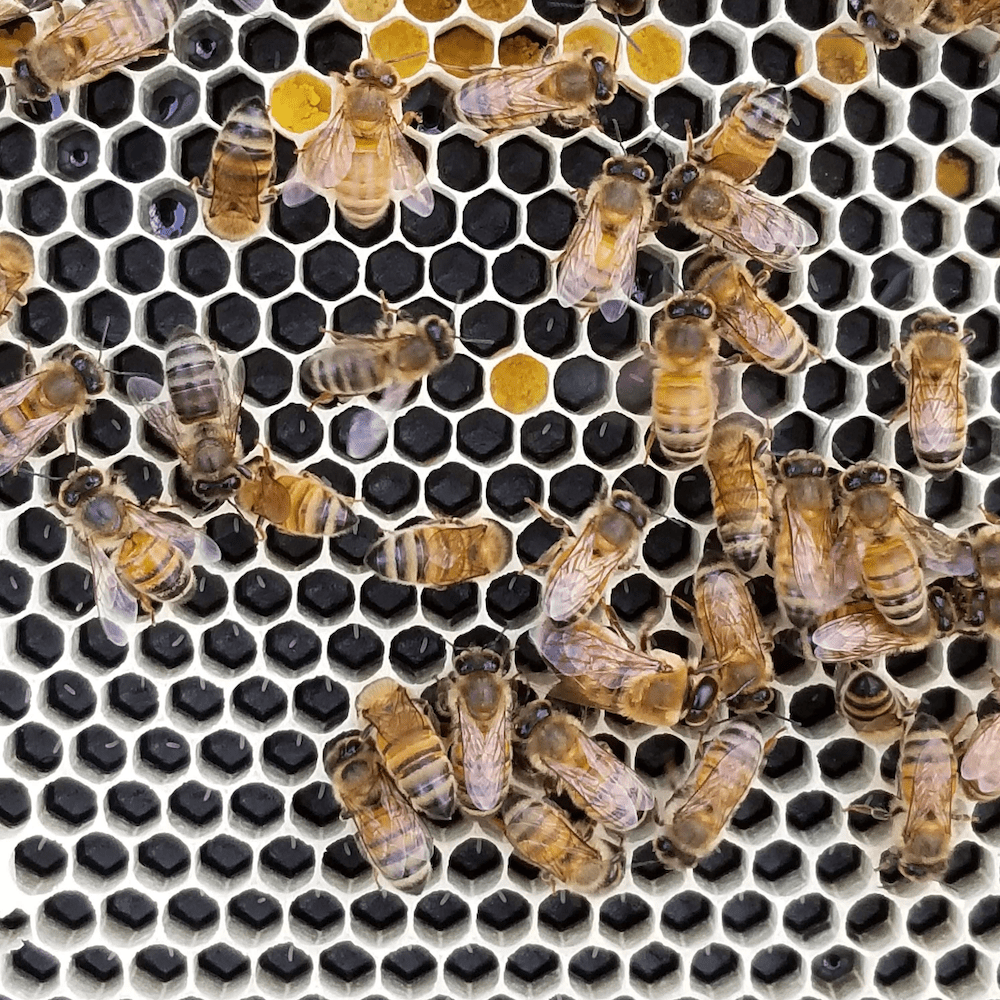
Eggs and larva on black foundation
The hooks on the foundation are designed to be placed in a wedge top bar and held in place by the removable wedge. Sometimes the frames will come without wires, and the wires will need to be melted into the foundation to provide support.

Eggs and larva on black foundation
The hooks on the foundation are designed to be placed in a wedge top bar and held in place by the removable wedge. Sometimes the frames will come without wires, and the wires will need to be melted into the foundation to provide support.
Beeswax Coated Plastic Foundation
Beeswax Coated Plastic Foundation
Plastic foundation is a food-grade sheet of plastic that has been formed with hexagons on both sides and coated with beeswax. Bees prefer the 100% beeswax foundation over plastic foundation if given the choice, and some beekeepers completely swear off it because of that. Plastic foundation has developed a negative reputation because of this.
WARNING SIDE NOTE HERE: We sell plastic foundation and when we started selling supplies, we would sell the plastic, rite-cell foundation from Mann-Lake. We sold it because it was easy to install, durable and wasn’t perishable. We felt bad selling it to beekeepers because we knew the bees didn’t really like it, especially compared to the 100% beeswax foundation. This is why plastic foundation has a bad reputation. There are some tricks to get the bees to like it: for example, you could spray it with sugar water or make sure you are feeding the bees sugar water when you give the foundation to them.
We didn’t like selling products with a “caveat”, so we went out of our way and start to work with a new supplier that would double the beeswax for us. We knew bees like beeswax so we gave them more of it. What we sell now is actually more than twice the industry standard. Turns out, the bees love it and we have never looked back. Most of the beekeepers who swear off of plastic foundation have only had experiences with the rite-cell foundation and don’t realize there is a better option, ours!
Plastic foundation can be bought in multiple colors like black, white and yellow. The color doesn’t make a difference to the bees, only to the beekeeper. Our black foundation has become popular because it is very easy to see the white eggs and larva against the black backdrop. This is a real bonus for beginner beekeepers who are getting started with their first hive.
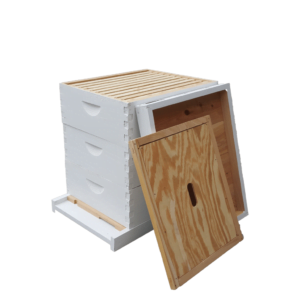
3, 10 frame medium boxes sitting on top of a bottom board
Bottom Boards
The bottom board is the floor of the hive and the piece of equipment that all the other equipment rests on. This piece of equipment is required for every hive and also serves as the primary entrance and exit for the bees. While the bottom board is the floor of the hive, it shouldn’t be the very bottom of the hive. The bottom board shouldn’t rest directly on the ground and should sit on top of cinder blocks or some other type of stand to keep the hive off of the ground.
Bottom boards come in three different sizes and two different styles. The sizes of the bottom board will match the size of the boxes, 10 frame, 8 frame, and 5 frame. The two styles of bottom boards are the solid bottom board and the screened bottom board.
Read more about choosing between 10 and 8 frame bee hives.
There is much (unnecessary) debate about which type of bottom board is best. Sometimes it would seem that if you use the other type, your bees will surely die because of your choice of bottom board. Both styles work great and will do a good job as a part of your bee hive. There are differences with both and fortunately, it is easy to try both types.
If starting with two hives (which is what we recomend), you can use a screened bottom board on one and the solid bottom on the other. With much of beekeeping, it comes down more to personal preferance than some beekeepers would make it seem.
Solid bottom boards
Solid bottom boards
The solid bottom board is the original design used and is a very popular option with beekeepers. It is a very simple design with a rail around three of the four sides on the top. The boxes sit on this rail and the one side without the rail is the entrance of the hive. The floor of the bottom board is a solid pieces of wood, plywood, etc.. The only way in and out for bees, air, ants, etc… is through the entrance of the hive.
The solid bottom board does make it easier for bees to protect their hive from pests like ants, small hive beetles and robbing bees or wasps. This is due to the restricted opening compared to the screened bottom board. Another advantage the solid bottom board will have is when using treatments for varroa mites. Most of the treatments work much better or require the bottom of the hive to be sealed.
The solid bottom board also offers more protection against cold drafts during the winter. This is especially helpful in very cold climates with long winters like the northern half of the United States. Winter can be difficult on bees and any edge you can give your bees to survive the cold, long winter is helpful to your bees.
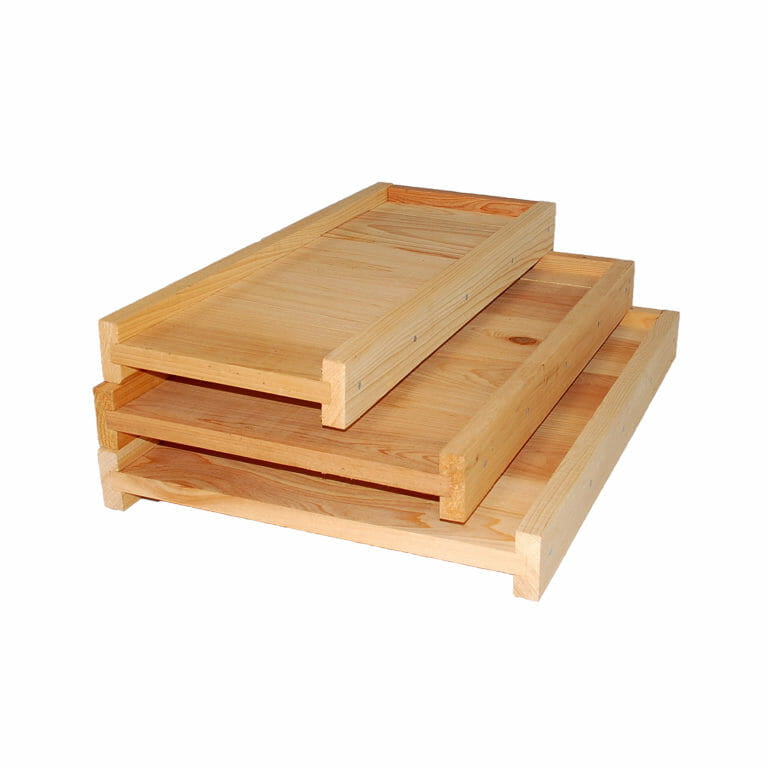
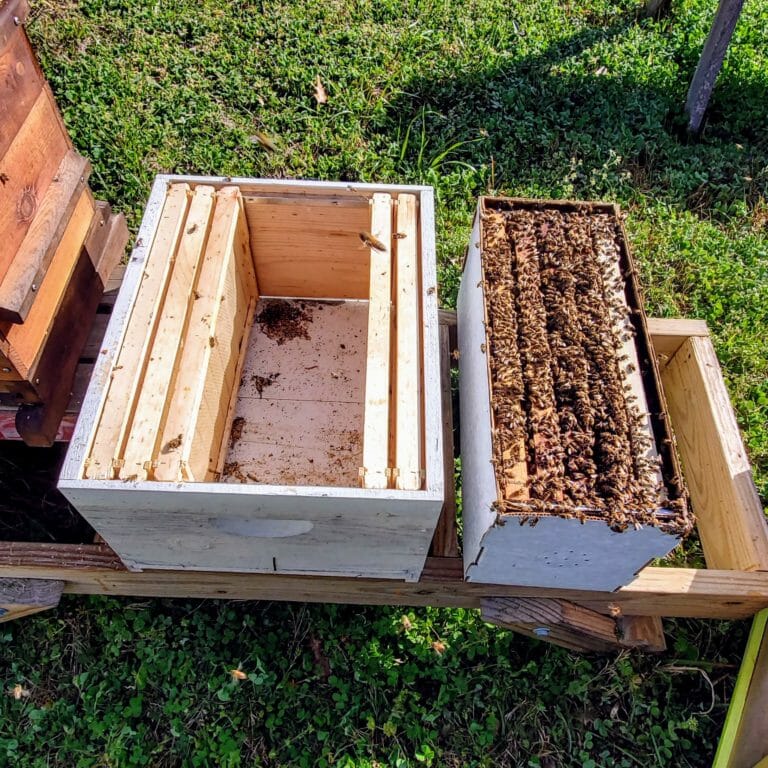
3, 10 frame medium boxes sitting on top of a bottom board
Screened Bottom Boards
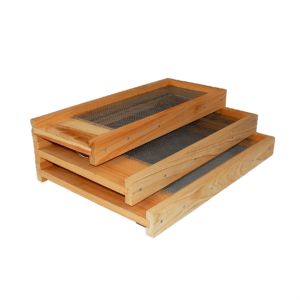
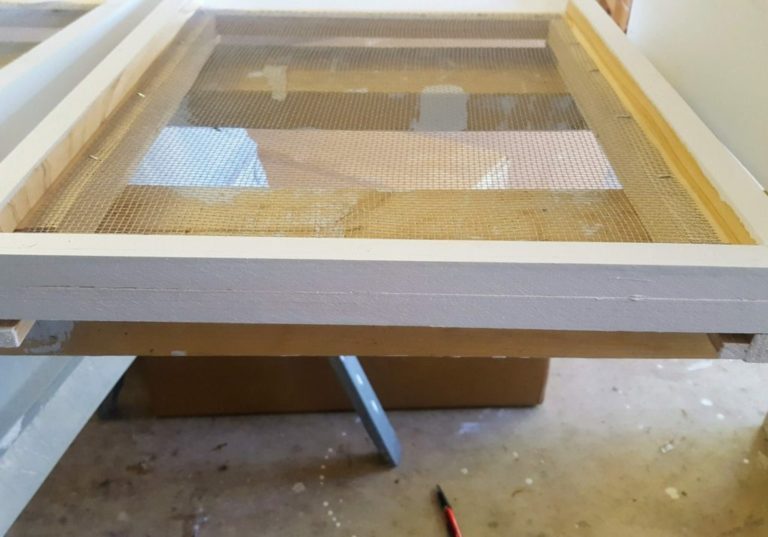
The screened bottom board follows the same design as the solid bottom board with only one entrance for the bees. Instead of the floor of the bottom board being a solid piece of wood, the middle of the bottom is covered with a mesh wire, called hardware cloth. The holes in the mesh are 1/8-inch which is too small for bees to pass through, but air can easily pass through it.
The ability for air to pass through the hive easier is one of the biggest advantages a screened bottom board can offer. The increased airflow helps the bees to remove excess water from the nectar and also helps to keep the hive from getting too hot when the population increases during the spring and summer. During the winter, the increased airflow could cause an issue if the hive is subject to a continual cold breeze.
The second advantage and the reason it was originally designed was to help control the population of varroa mites inside the hive. These mites live on the bees and some of them naturally fall off the bees. With the screened floor, the mites have a chance to fall off the bee and completely out of the hive. This is a real advantage, but alone it can not keep mite populations from increasing to a damaging level.
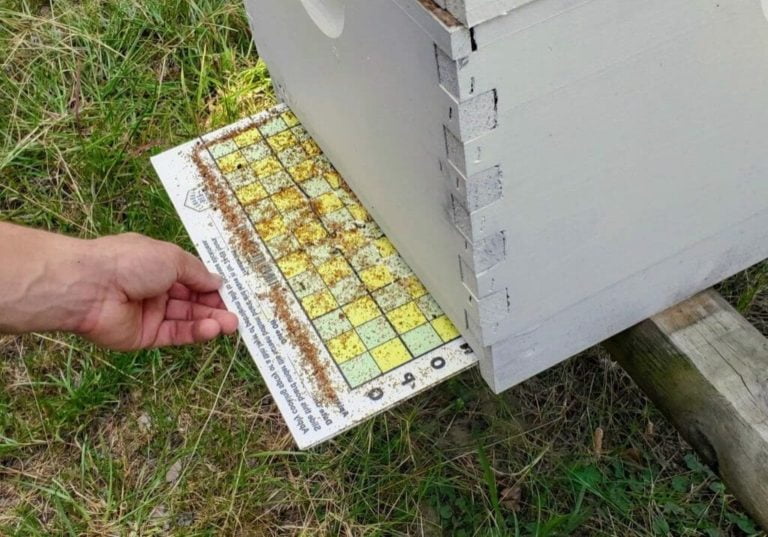
A feature of our bottom board, but not all bottom boards, is a small rail underneath the screen. A corrugated board or a small hive beetle tray can be slid under the screen on this rail. The small hive beetle tray can be partially filled with oil and serve as a trap for the beetles and is very effective at catching them.
The corrugated board (think political sign) can be used to make decisions about treatments for varroa mites, but can also stop much of the cold drafts during the winter. If buying a screened bottom board, look for this feature.
Surprisingly, many beekeepers who use screened bottom boards in cold climates do not restrict the opening on the bottom of the hive at all during the winter. The bees are actually able to regulate the temperature of their colony well enough to survive with a screened bottom board open all year.
Hive Covers
The very top of the hive is where the covers sit, protecting the hive day in and day out. The covers are the hive’s primary protection from the elements and also help to keep the hive warm during the winter. There are several variations of the covers, but their main job is just to keep the rain out; they are the roof of the hive. If they can do that, they are doing their job.
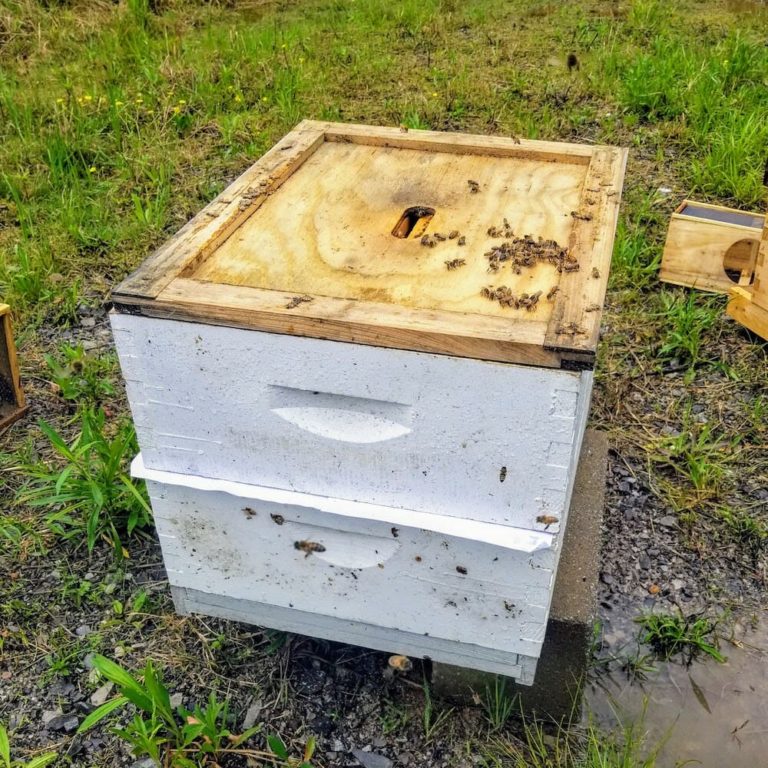
10 frame inner cover on top of hive
Telescoping Cover
The telescoping cover is far and beyond the most popular cover among backyard beekeepers. It is called a telescoping cover because all sides of the cover are wider than the box and drop down completely covering the top edge of the box. This makes it virtually impossible for rain to blow into the colony through the top of the hive.
Some of the telescoping covers are covered in aluminum, which we highly recommend vs the covers that do not have an extra metal covering. The telescoping cover is in the weather all year long and will face the sun, hail, and rain. All can easily damage wood, and a quick way to kill a hive is by letting rain inside the hive.
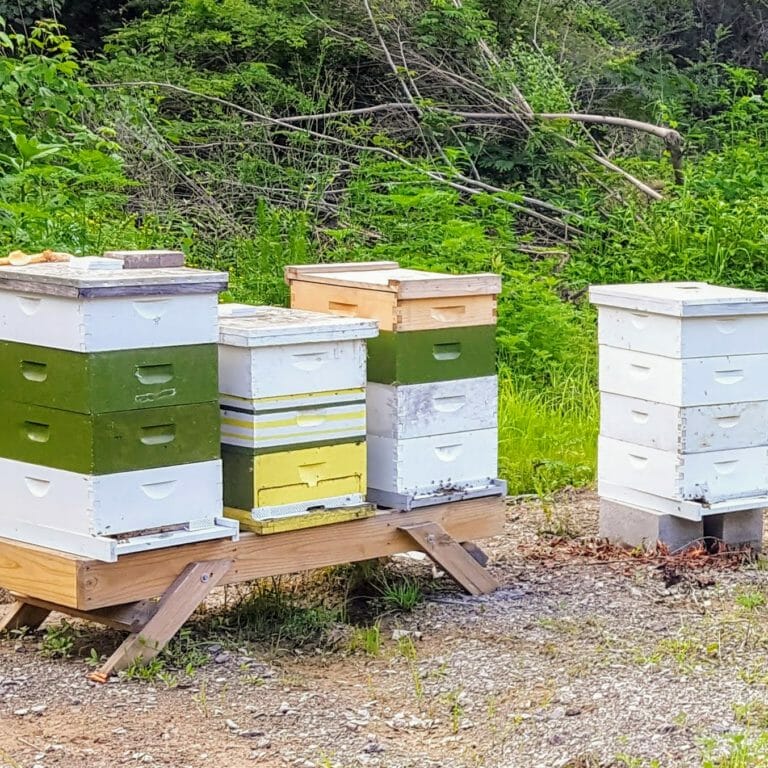
An unpainted migratory cover hive next to several telescoping covers
Inner cover
Inner covers are used in conjunction with the telescoping cover and act as the ceiling of the hive. Without the inner cover, the telescoping cover would be very difficult to remove from the hive. The bees will actually glue pieces of the hive together with propolis that will need to be pried apart. Because of the design of the telescoping cover, it would be difficult to get a hive tool in a place where the telescoping cover can be removed without banging on the hive (bees don’t like that). With an inner cover in place, it is much easier to remove the telescoping cover.
Inner covers can also be modified to give the bees an upper entrance to the hive and can also help with ventilation and feeding.
Migratory cover
Migratory covers are not as popular with backyard beekeepers because they don’t offer very good protection from the weather. These are popular with migratory (commercial beekeepers who pollinate different crops) beekeepers because a hive can be strapped together easily and stacked onto a semi-truck. A hive with a telescoping cover can not be set flush against another hive with a telescoping cover without a gap. The migratory cover allows migratory beekeepers to easily stack hives side by side efficiently.
While not common on backyard beekeeper hives, migratory covers are the industry standard cover for nucleus hives. This is because nucleus hives are typically a temporary hive where the year-round protection from the elements isn’t necessary.
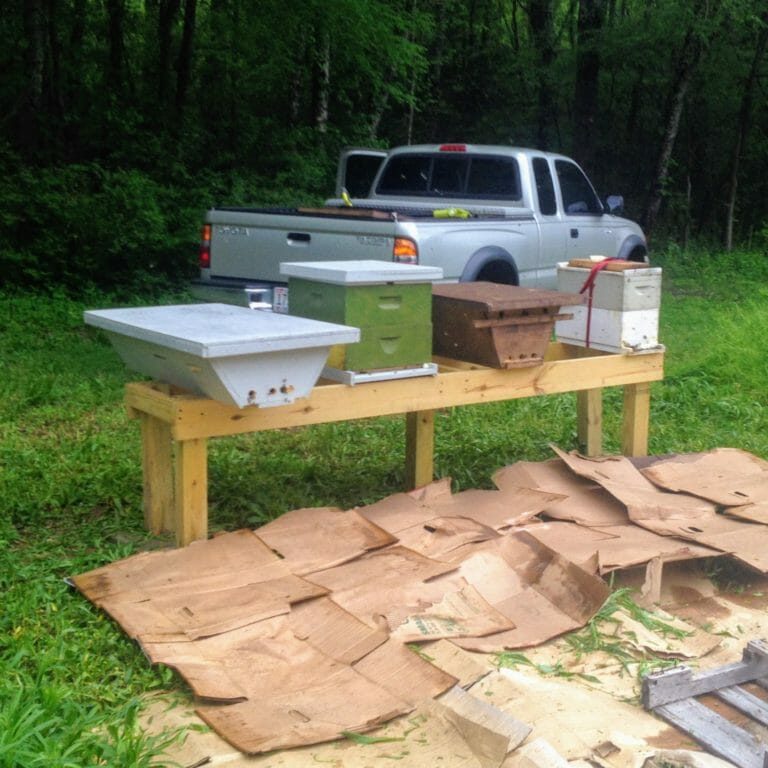
Two top bar hives (gray/brown) and 2 Langstroth hives
Top Bar Bee Hives
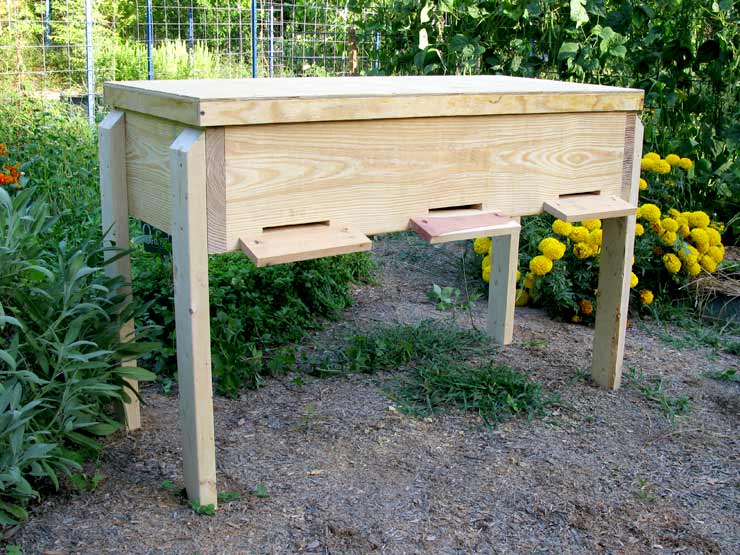
The top bar hive is the 2nd most popular hive in the US, behind the Langstroth hive. The top bar hive originated in Africa as a low-cost alternative to the more expensive traditonal hives. The top bar hive has a very simple design and can actually be made with simple hand tools from less wood than traditional hives. The design more closely resembles a feeding trough than a traditional hive because of its horizontal configuration.
The advantage of a top bar hive is it can be managed without lifting heavy boxes and is more suited to beekeepers unable to lift much weight. Instead of stacking boxes on top of each other, the colony of bees lives in the trough, building their comb and moving from one side of the trough to the other. Some beekeepers claim top bar hives are more natural than a langstroth hive because of this, but a wild colony of bees will live in cavaties of all types.
The more natural side of top bar hives is the type of comb the bees build. Top bar hives do not use any foundation, so bees are able to build their comb according to their own requirements. They will build cells of all different sizes which is what bees do in the wild. The benefits of this is nuanced, but it is hard to argue with allowing bees to do what they naturally do.
The cavity inside the top bar hive is rather small compared to the Langstroth hive, usually about the volume of 2, 10-frame deep boxes. Bees will need more space than this each year and will become crowded each spring and summer. This is actually what bees want and is the amount of space they would choose if choosing their own cavity. Because of this, the colony of bees will reproduce itself and swarm several times each year unless the beekeeper does something to prevent it. This is good for the bees but a negative for the beekeeper, depending on their goals.
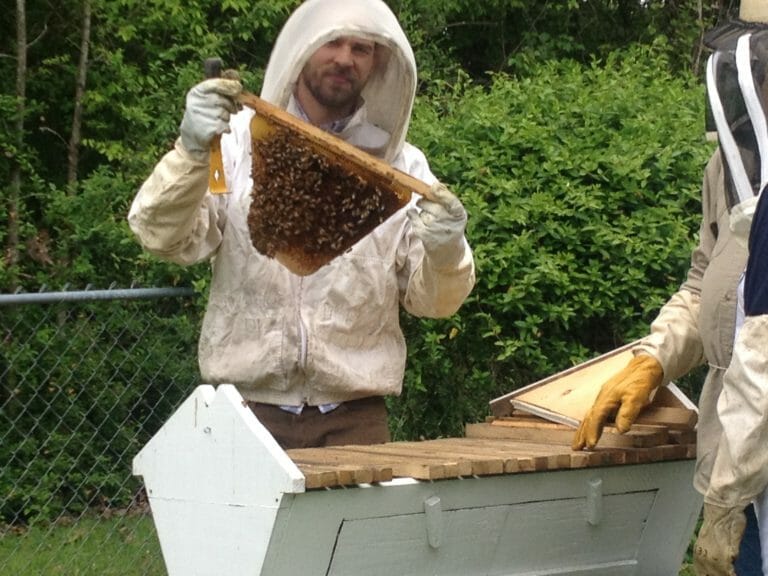
A sheet of top bar hive comb being held by the top bar
Top bar Hive "Frames"
The frames on a top bar hive differ from the normal Langstroth frames in that the top bar hive frames are only one piece of wood. They lack the side bars, bottom bars, and foundation for a langstroth frame. Because of this, the bees build their comb directly underneath the top bar in an incredible shape that matches the sides of the box. The top bar hive box is made with slanted sides and this helps prevent the bees from attaching the comb to the sides of the hive.
Bees do not always build their comb in such a beautiful pattern and can build something called “cross-comb.” Ideally, the comb is built with one sheet of comb on one top bar. Without foundation to help, bees will sometimes build one sheet of comb across multipe top bars. Fixing this is essential and can be difficult for a new beekeeper.
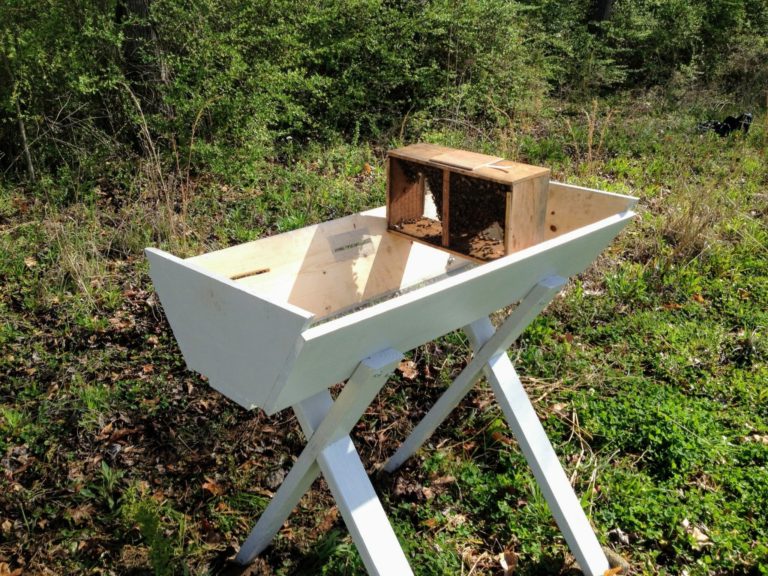
Package of bees about to be installed in top bar hive
Top Bar Designs
The design of a top bar hive is naturally very simple, which allows for multiple designs being available. Some are 3′ long, and some are 4′ long, the angle of the side walls vary widely from one design to another. Some of the top bars are 19″ long and some are 20 or 21 inches long. The wide range of top bar hive designs leads to a lack of consensus among suppliers.
Unlike Langstroth designs, there isn’t a basic design that all manafacturers use for top bar hives. Because of this, it can be difficult to buy parts for a top bar hive, especiallly when you need equipment quickly. This is why most beekeepers who use top bar hives build the equipment themselves.
We have kept bees in top bar hives and are a fan of their design. We were able to learn so much about how bees build their comb from our time with top bar hives. If you’d like to learn more about them, these are three great books we recommend on the topic.
We have kept bees in top bar hives and are a fan of their design. We were able to learn so much about how bees build their comb from our time with top bar hives. If you’d like to learn more about them, these are three great books we recommend on the topic.
Horizontal Langstroth Hive / Long Langstroth / Long Lang
Horizontal Langstroth Hive / Long Langstroth / Long Lang
The horizontal Langstroth hive is not as common as the Langstroth and Top Bar Hive but has become a very good alternative for beekeepers. The design borrows features from the other types of hives so that it easy to manage without heavy lifting but has wooden frames that are easier for the beekeeper to handle.
This hive takes the shape of the top bar hive, but with straight sides instead of slanted sides. Most horizontal Langstroth hives are built to hold deep frames, which are much easier to handle and less fragile than the normal top bar hive frame. These frames give the comb support on all four sides of the comb instead of just by the top bar.
The addition of the frames helps prevent much of the frustration that can come from a top bar hive. With a top bar hive, the top bars are the most difficult part to make, and finding the right size can be difficult. Using the standard Langstroth frames eliminates the problem.
Video showing transfering bees from a traditional Langstroth frame to a horizontal hive.
Allowing the bees to build their comb naturally without the assistance of foundation, is also much easier to do in a horizontal Langstroth hive. Foundationless frames are Langstroth frames that are designed to be used without a sheet of foundation in them. These types of frames can be used in a regular Langstroth hive and are actually how we started our very first hive.
With a horizontal Langstroth hive, the space is finite and the bees can get crowded quickly, just like in a top bar hive. They require a little more hands-on management to prevent swarming than a typical Langstroth hive. With the foundation-less frames, cross comb can still be an issue, but with the help of a few frames with foundation, that can be helped.
How Much Does Beekeeping Cost?
How Much Does Beekeeping Cost?
Beekeeping is not as inexpensive as some other hobbies and, depending on your beekeeping goals, can pay for itself. Beekeeping is unique because it is a hobby that can support itself and return a profit. It’s hard to do that with gardening!
Most beekeepers start with two hives which is what we recommend. Beekeepers who start with two hives are more successful than beekeepers who start with one hive after their first year. This is because the resources from a strong hive can actually be shared with a weak hive, and this isn’t possible when you only have one hive.
Depending on your goals and abilities, the cost to get started will vary, but this is a good reference. For example, if you assemble and paint your own bee equipment, you will save money vs. buying it assembled and painted already.
Protective gear (jacket/gloves) – $40-150
Hand tools (smoker/hive tool) – $30-60
Feeding supplies (feeders/sugar) – $50
Bees (packages or nucleus hives) – $200-350
Two Langstroth hives – $250-500
Hive stand – $30-100
Total – $600-1,330
All of these supplies (except sugar) are reusable year after year, so the 2nd and 3rd-year costs are much less than the startup cost. Additional expenses expected during the following years are more boxes, frames, etc. if you want to start more hives. You may also need additional boxes for bees to store honey in, honey-extracting equipment, and containers for bottling honey.
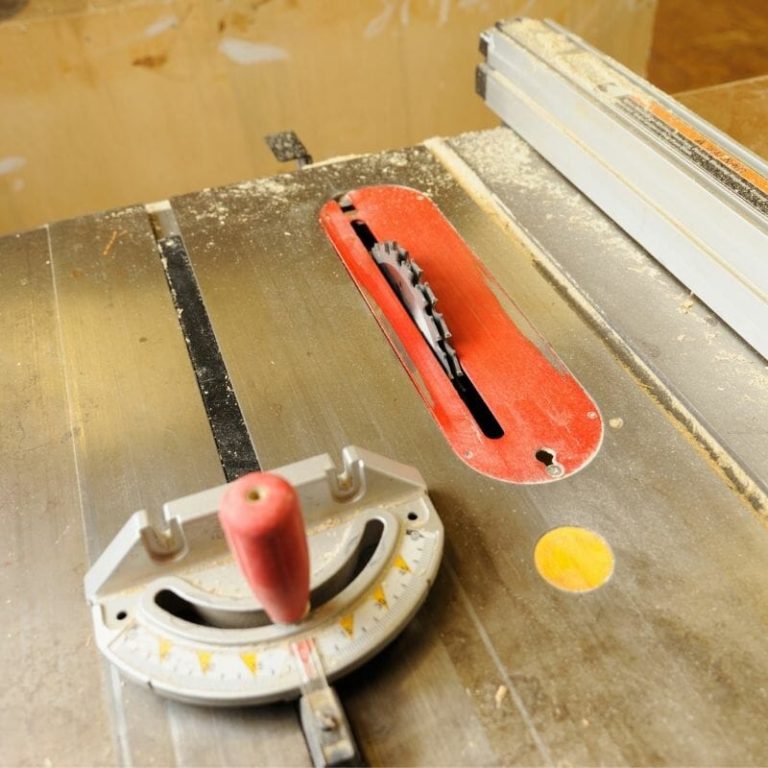
If you are using a table saw and plan on making most of your own equipment, the stacked dado is a blade that makes it much easier to make the necessary cuts. This is a blade set we have used for years that works great for backyard beekeepers
Making Your Own Equipment
It is possible to make your own equipment if you have the tools to do it and many people choose to do this because they like building. If saving money is the sole purpose of making your own equipment, it may not be worth the effort. The cost of wood is rather high and the amount of wood needed to make the hives is fairly significant.
If you happen to have access to affordable or free lumber, it may be worth it if you already have the tools on hand. The easiest equipment to make is the bottom boards, telescoping covers, and inner covers. The boxes are simple to make too, but it’s the nature of beekeepers to make things more complicated than necessary. This glue is your friend when putting boxes together.
Most equipment can be made with a table saw or a circular saw and the only special cut that needs to be made is a rabbet joint on the inside of the boxes for the frame to rest. All other joints can be made with simple butt joints, wood glue, and staples/nails.
If you are interested in making your own equipment, this is a fantastic book that will provide all the dimensions and cuts necessary for all the equipment.
It is very rare for beekeepers to make their own frames from scratch. There are too many small cuts to be worth it, and frames are not very expensive to buy already cut. Most beekeepers buy them unassembled and assemble the frames themselves to save money.
Assembling Options For Beekeeping Equipment
Assembling Options For Beekeeping Equipment
Assembling your own beekeeping equipment is the place where it is an easy place to save money when getting started. When buying from most suppliers, you will get the option to get the equipment unassembled, assembled, or both painted and assembled. Assembling your own equipment is not that difficult to do, but does take some time. There are some jigs that are very handy for putting together frames and boxes.
For most suppliers, the only pieces that need assembling are boxes and frames. With the exception of Rossman Apiaries, you will only need to assemble the boxes and frames. Both of these can be assembled using basic tools like a hammer and nails.
Frames can be very tedious to put together if putting together over 50 frames. Because of this, it is helpful to have an air nailer or stapler for putting together the frames. We cannot emphasize this enough; it is important to use glue when assembling the frames. They are very difficult to repair if the nails or staples pull out after the bees build comb in the frame. Trust us, use glue on boxes and especially frames.
These are the tools we use and recommend for assembling equipment. These staples below are too small for boxes. 7d nails are a better choice for boxes than the narrow crown staples used for frames.

